Laser Cutter Tutorial
We have a Bright Star LG500tt 60 Watt laser cutter.
The laser cutter is a powerful, but very dangerous tool. If you use it incorrectly you can poison yourself (and others) and burn down the building. Use it carefully and thoughtfully. In particular:
DO NOT CUT DANGEROUS OR UNKNOWN MATERIALS.
NEVER LEAVE THE MACHINE UNATTENDED WHILE IT IS CUTTING.
1. Create the pattern you are going to cut using a drawing program like Adobe Illustrator
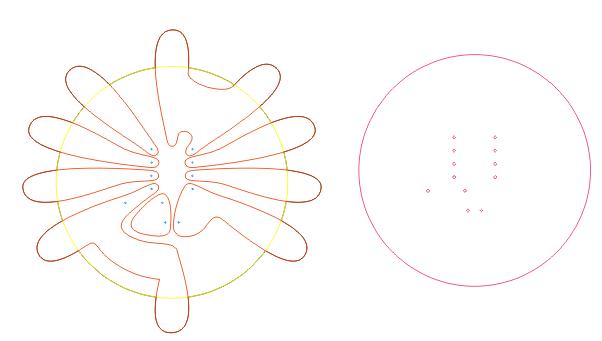
2. Export your drawing
3. Open the LaserCut 5.1 software
4. Import your drawing
Alternately, you can open an existing laser cutter file (.ecp). Here is my fabric PCB file in ecp format: ATtiny13FabricPCB.txt Note: change the extension from .txt to .ecp after downloading. The wiki software does not allow you to upload .ecp files.
5. Get your material ready
DO NOT CUT ANYTHING UNLESS YOU ARE POSITIVE IT IS SAFE!!!!
THERE IS NO CHEMICAL VENTILATION/FILTERING IN THE HIGH-LOW TECH LAB.
CUTTING UNSAFE MATERIALS CAN CAUSE SERIOUS DAMAGE TO YOUR HEALTH AND THAT OF THOSE AROUND YOU. CUTTING PVC, VINYL, OR THAT MYSTERIOUS PLASTIC YOU PICKED UP IN CHINATOWN CAN POISON ALL OF THE 5TH FLOOR! DON'T DO IT!!
Safe materials include: wood, paper, acrylic, cotton, wool, and silicone.
Unsafe materials include: vinyl, PVC, and any highly reflective material.
Make sure your material fits into the laser cutter. The high-low tech laser bed is 30cm x 50 cm, approximately 12 x 20 inches.
6. Find the proper settings for your material and position your drawing in the software
Note, you can match different colors to different cut/engrave settings within one drawing.
The order the colors are listed in in the software is the order in which they will be cut.
7. Save your .ecp file if you want the layout & cut settings for your drawing saved
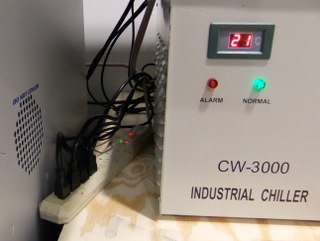
8. Turn everything on and home the machine.
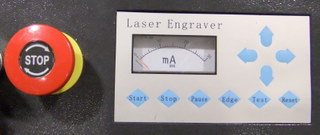
Press the reset button on the machine controls or in the software to home the machine. Note: not homing the machine will result in the machine attempting to cut beyond its boundaries. It's an important step! The laser cutter control panel:
9. Focus the laser cutter
Place your material into the machine
Use the arrow keys on the machine controls or in the software to move the laser head over your material.
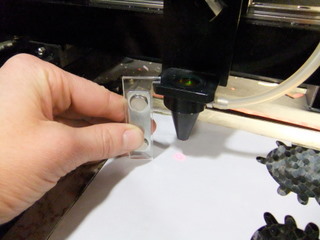
Get the focusing tool, which is magnetically attached to the front of the machine.
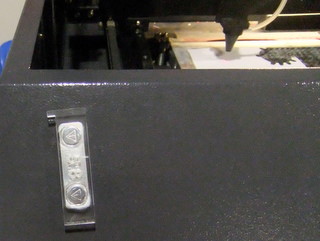
Use the focusing tool and the socket wrench to adjust the height of the bed so that the notch on the focusing tool rests on the plate that is holding the lens. This will focus the laser at the surface of your material.
Adjusting the height of the table:
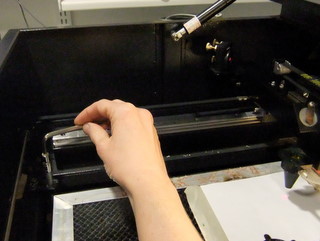
When you're done focusing, return the focusing tool to the front of the machine and the socket wrench to the platform inside the machine.
10. Cut your part
To test the boundaries of your cut job, hit the edge button on the machine controls or in the software. This will move the laser cutter head in a square around the perimeter of your job. This is a good way to determine if your drawing and material are properly aligned.
Hit start to begin the job.
Hit pause to pause the job. Hitting start again will resume the job.
Hit stop to stop the job. Hitting start again after you've pressed stop will start the job from the beginning.
You can also open the lid of the laser cutter to immediately stop cutting.
Hitting the big red STOP safety button will immediately turn off the machine. \\\