Shape Changing Textile
by Vernelle Noel
Our assignment this week was to “create a soft, flexible, textile-based sensor and embed it in an Arduino project. Design a textile construction that changes shape using flexinol (nitinol) wire.“
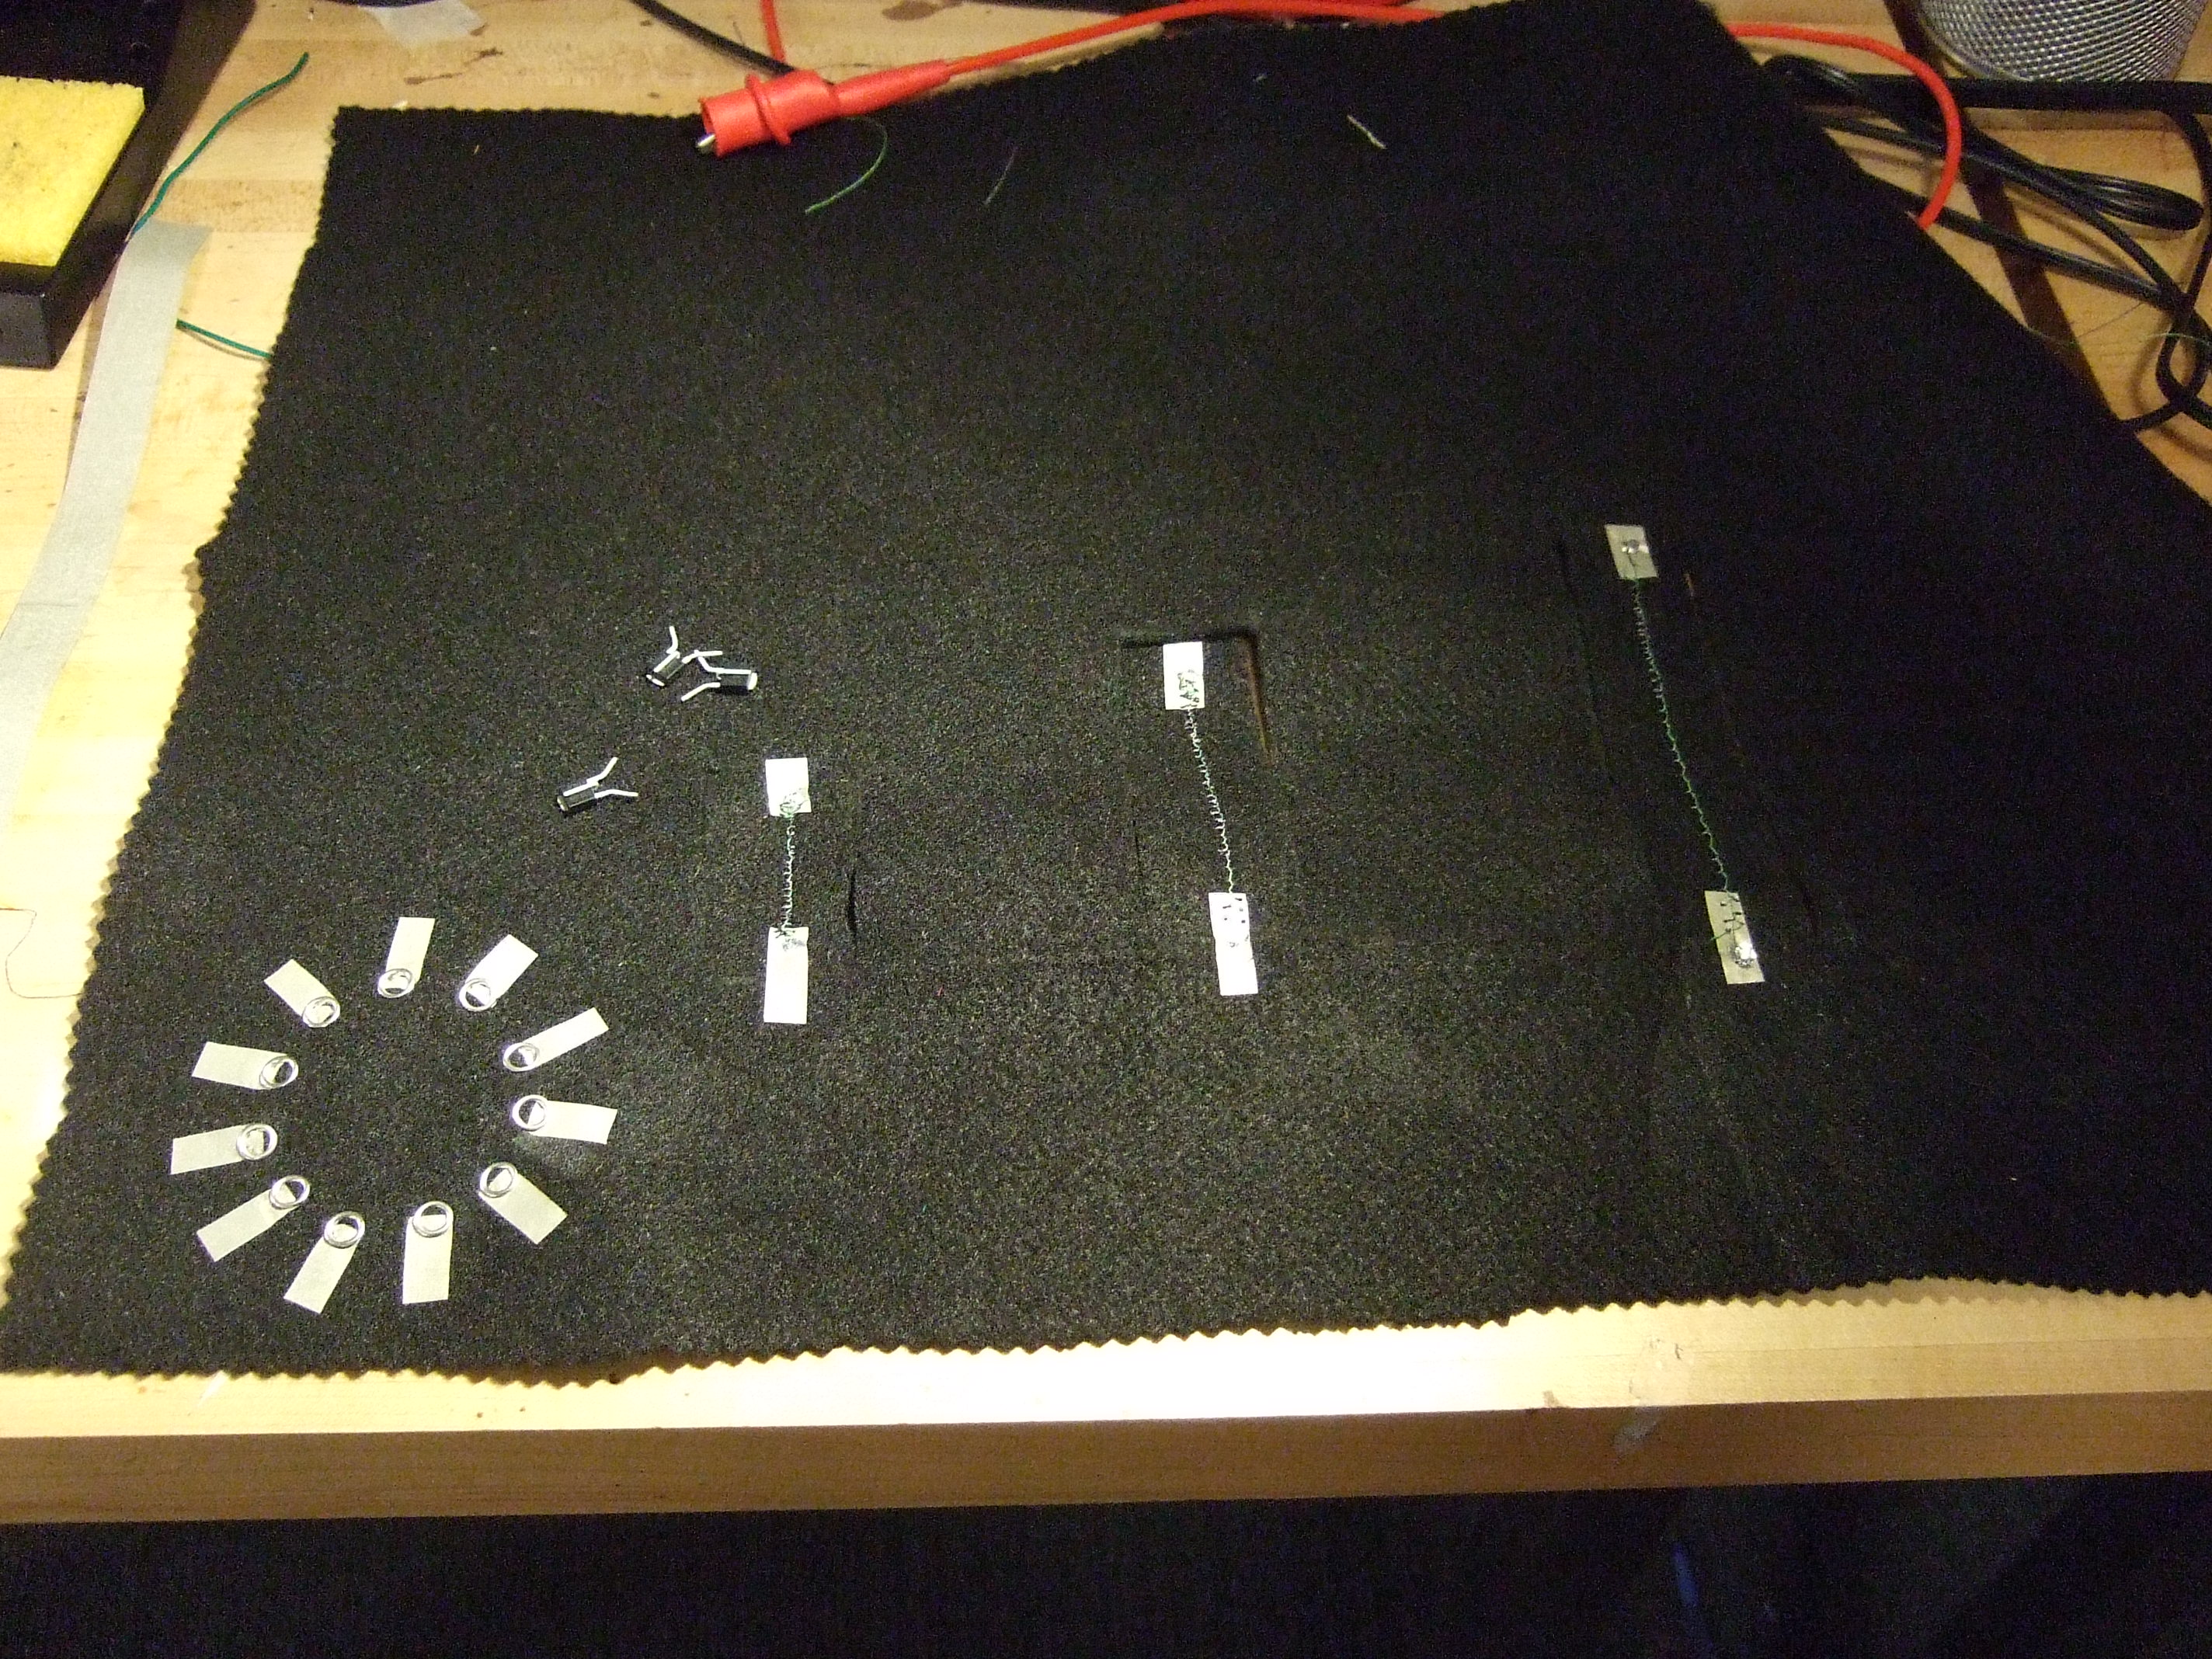
This week I decided to actuate three strips of felt with the nitinol. My goal was to understand the material, and the electronics… the circuitry behind the whole thing. Since i would be activating three strips separately, I would need three mosfets.
A MOSFET is a voltage controllable switch, “a metal–oxide–semiconductor field-effect transistor (MOSFET, MOS-FET, or MOS FET) used for amplifying or switching electronic signals.”
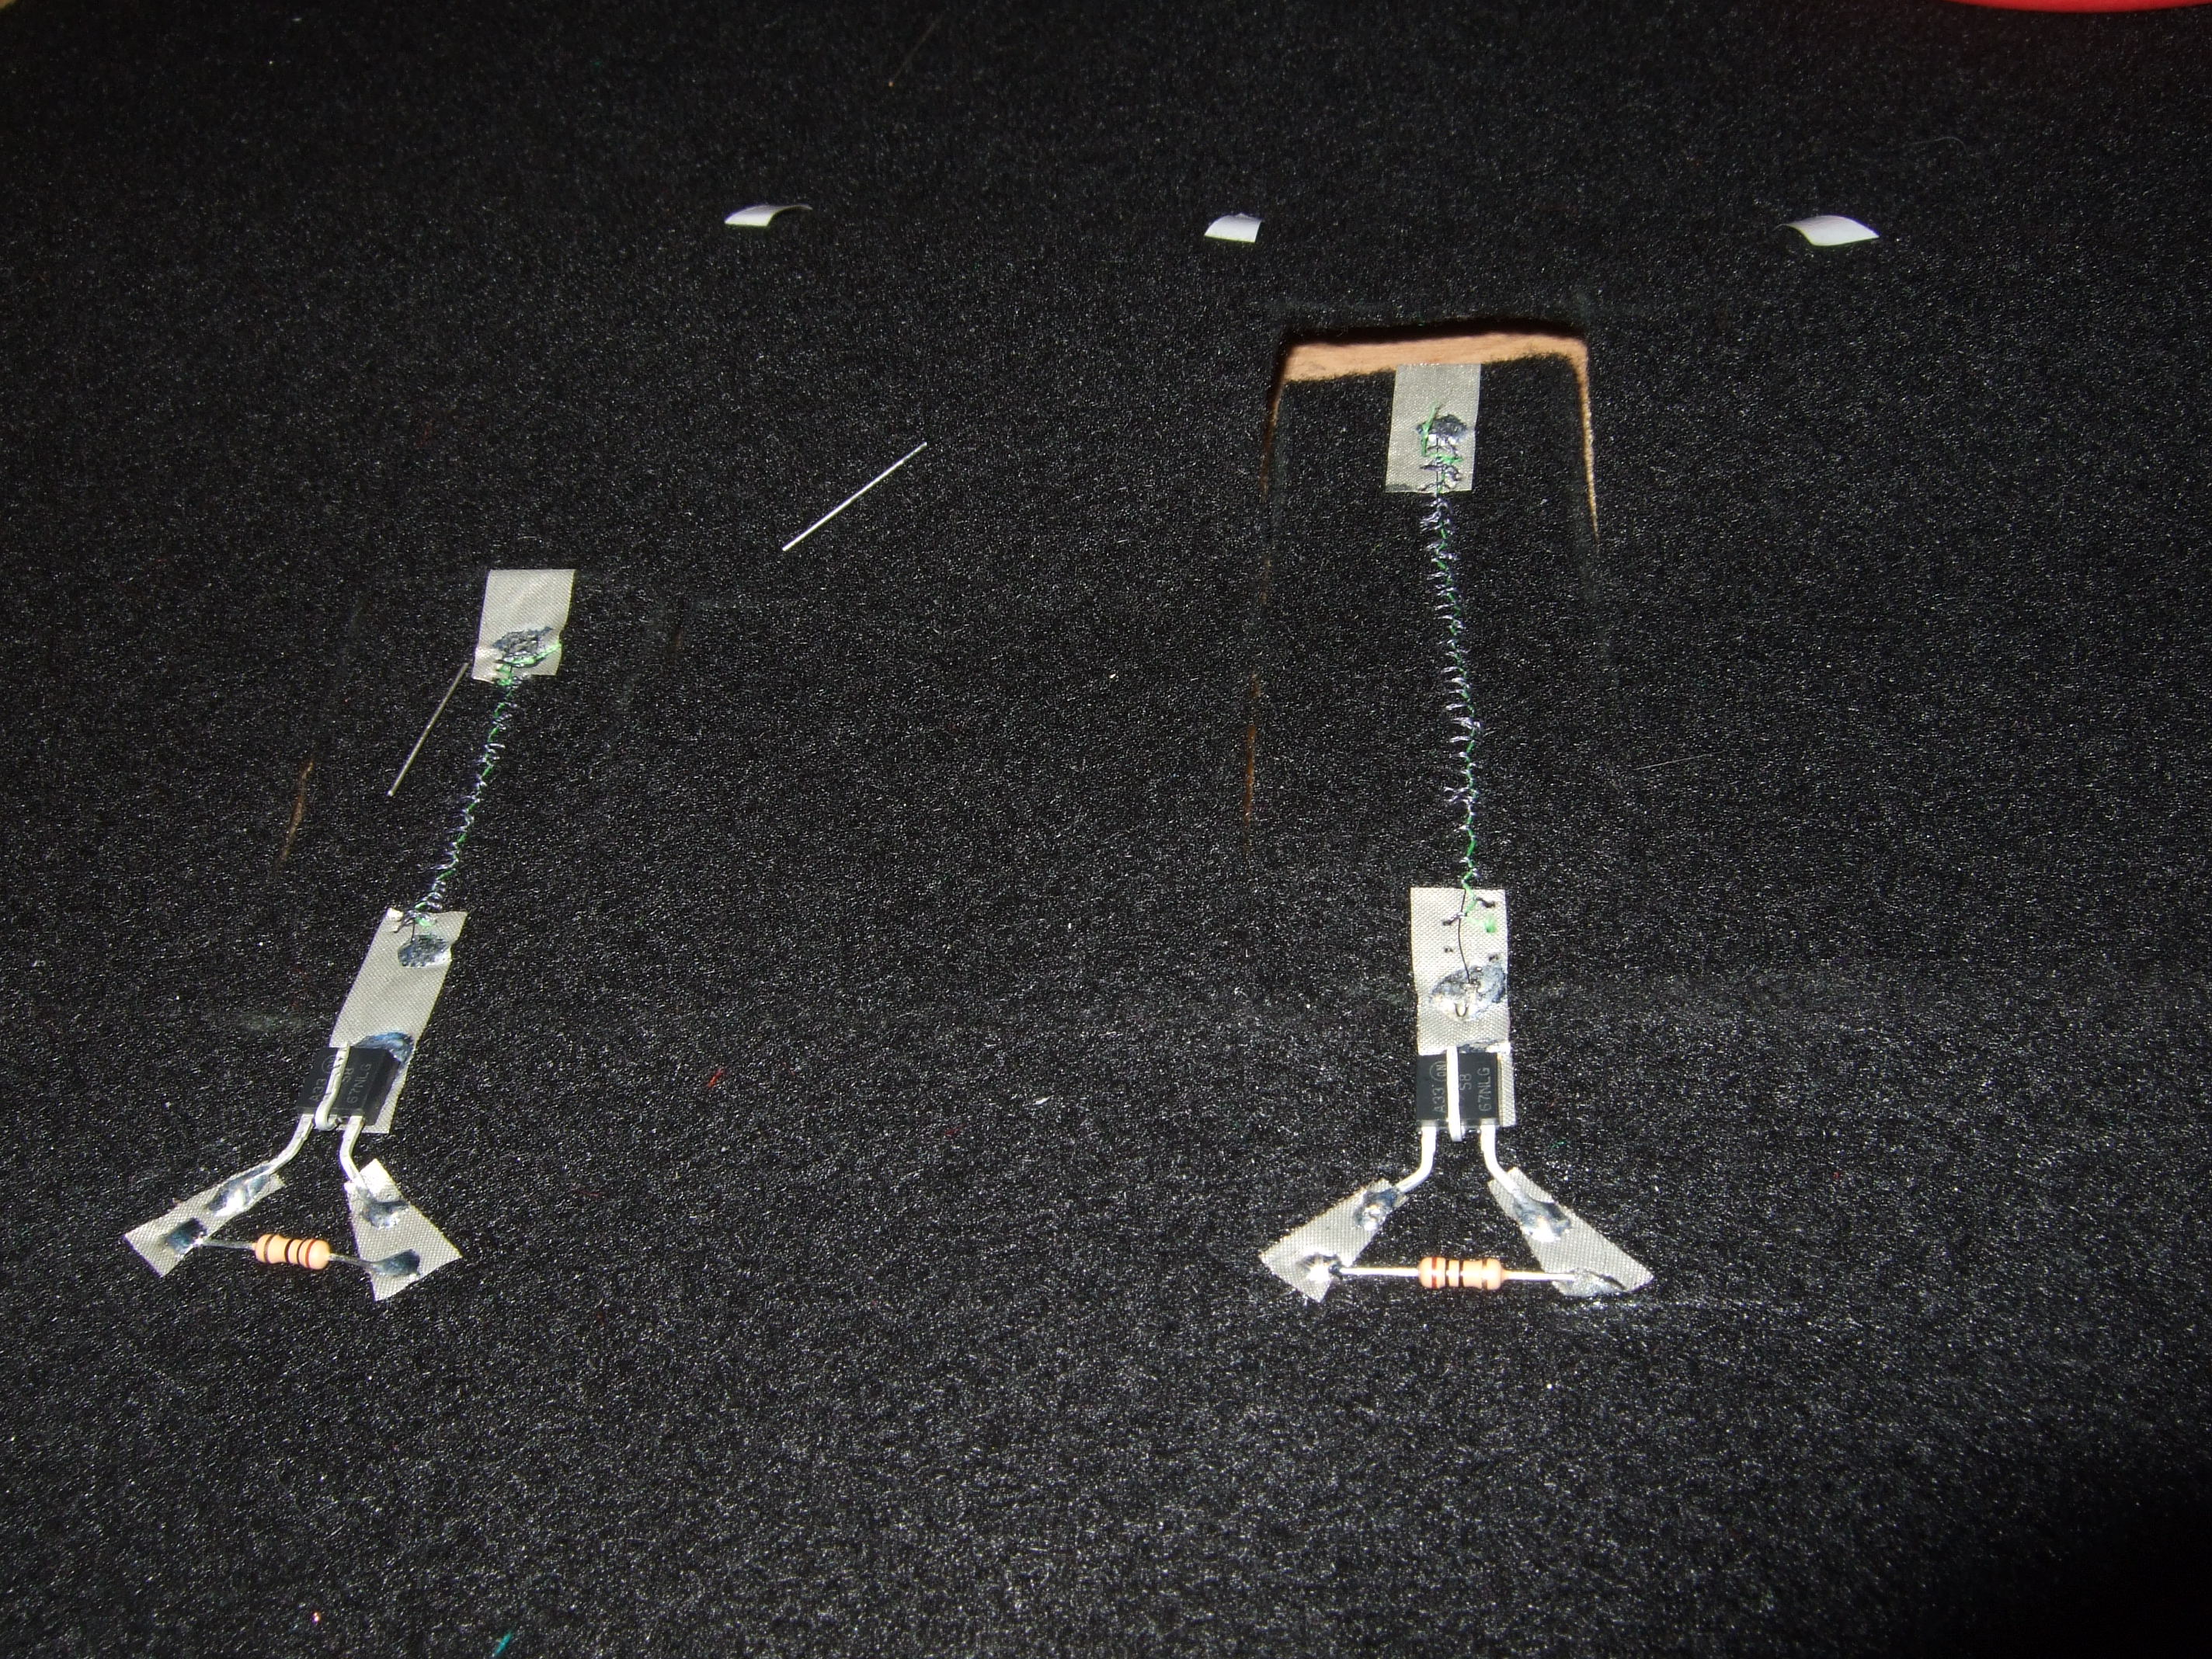
I stitched and soldered the components that I would need to create my circuit for our assignment. Above you can see my mosfets with their respective 1M Ohm resistors. The nitinol must be prepared to be soldered to the conductive fabric. The ends of the nitinol was curled into a hook and inserted into a crimp bead. Then using a pliers the nitinol was squeezed tightly in the crimp bead. I stitched the nitinol down to the felt with a zig-zag stitch then soldered the ends to the conductive fabric.
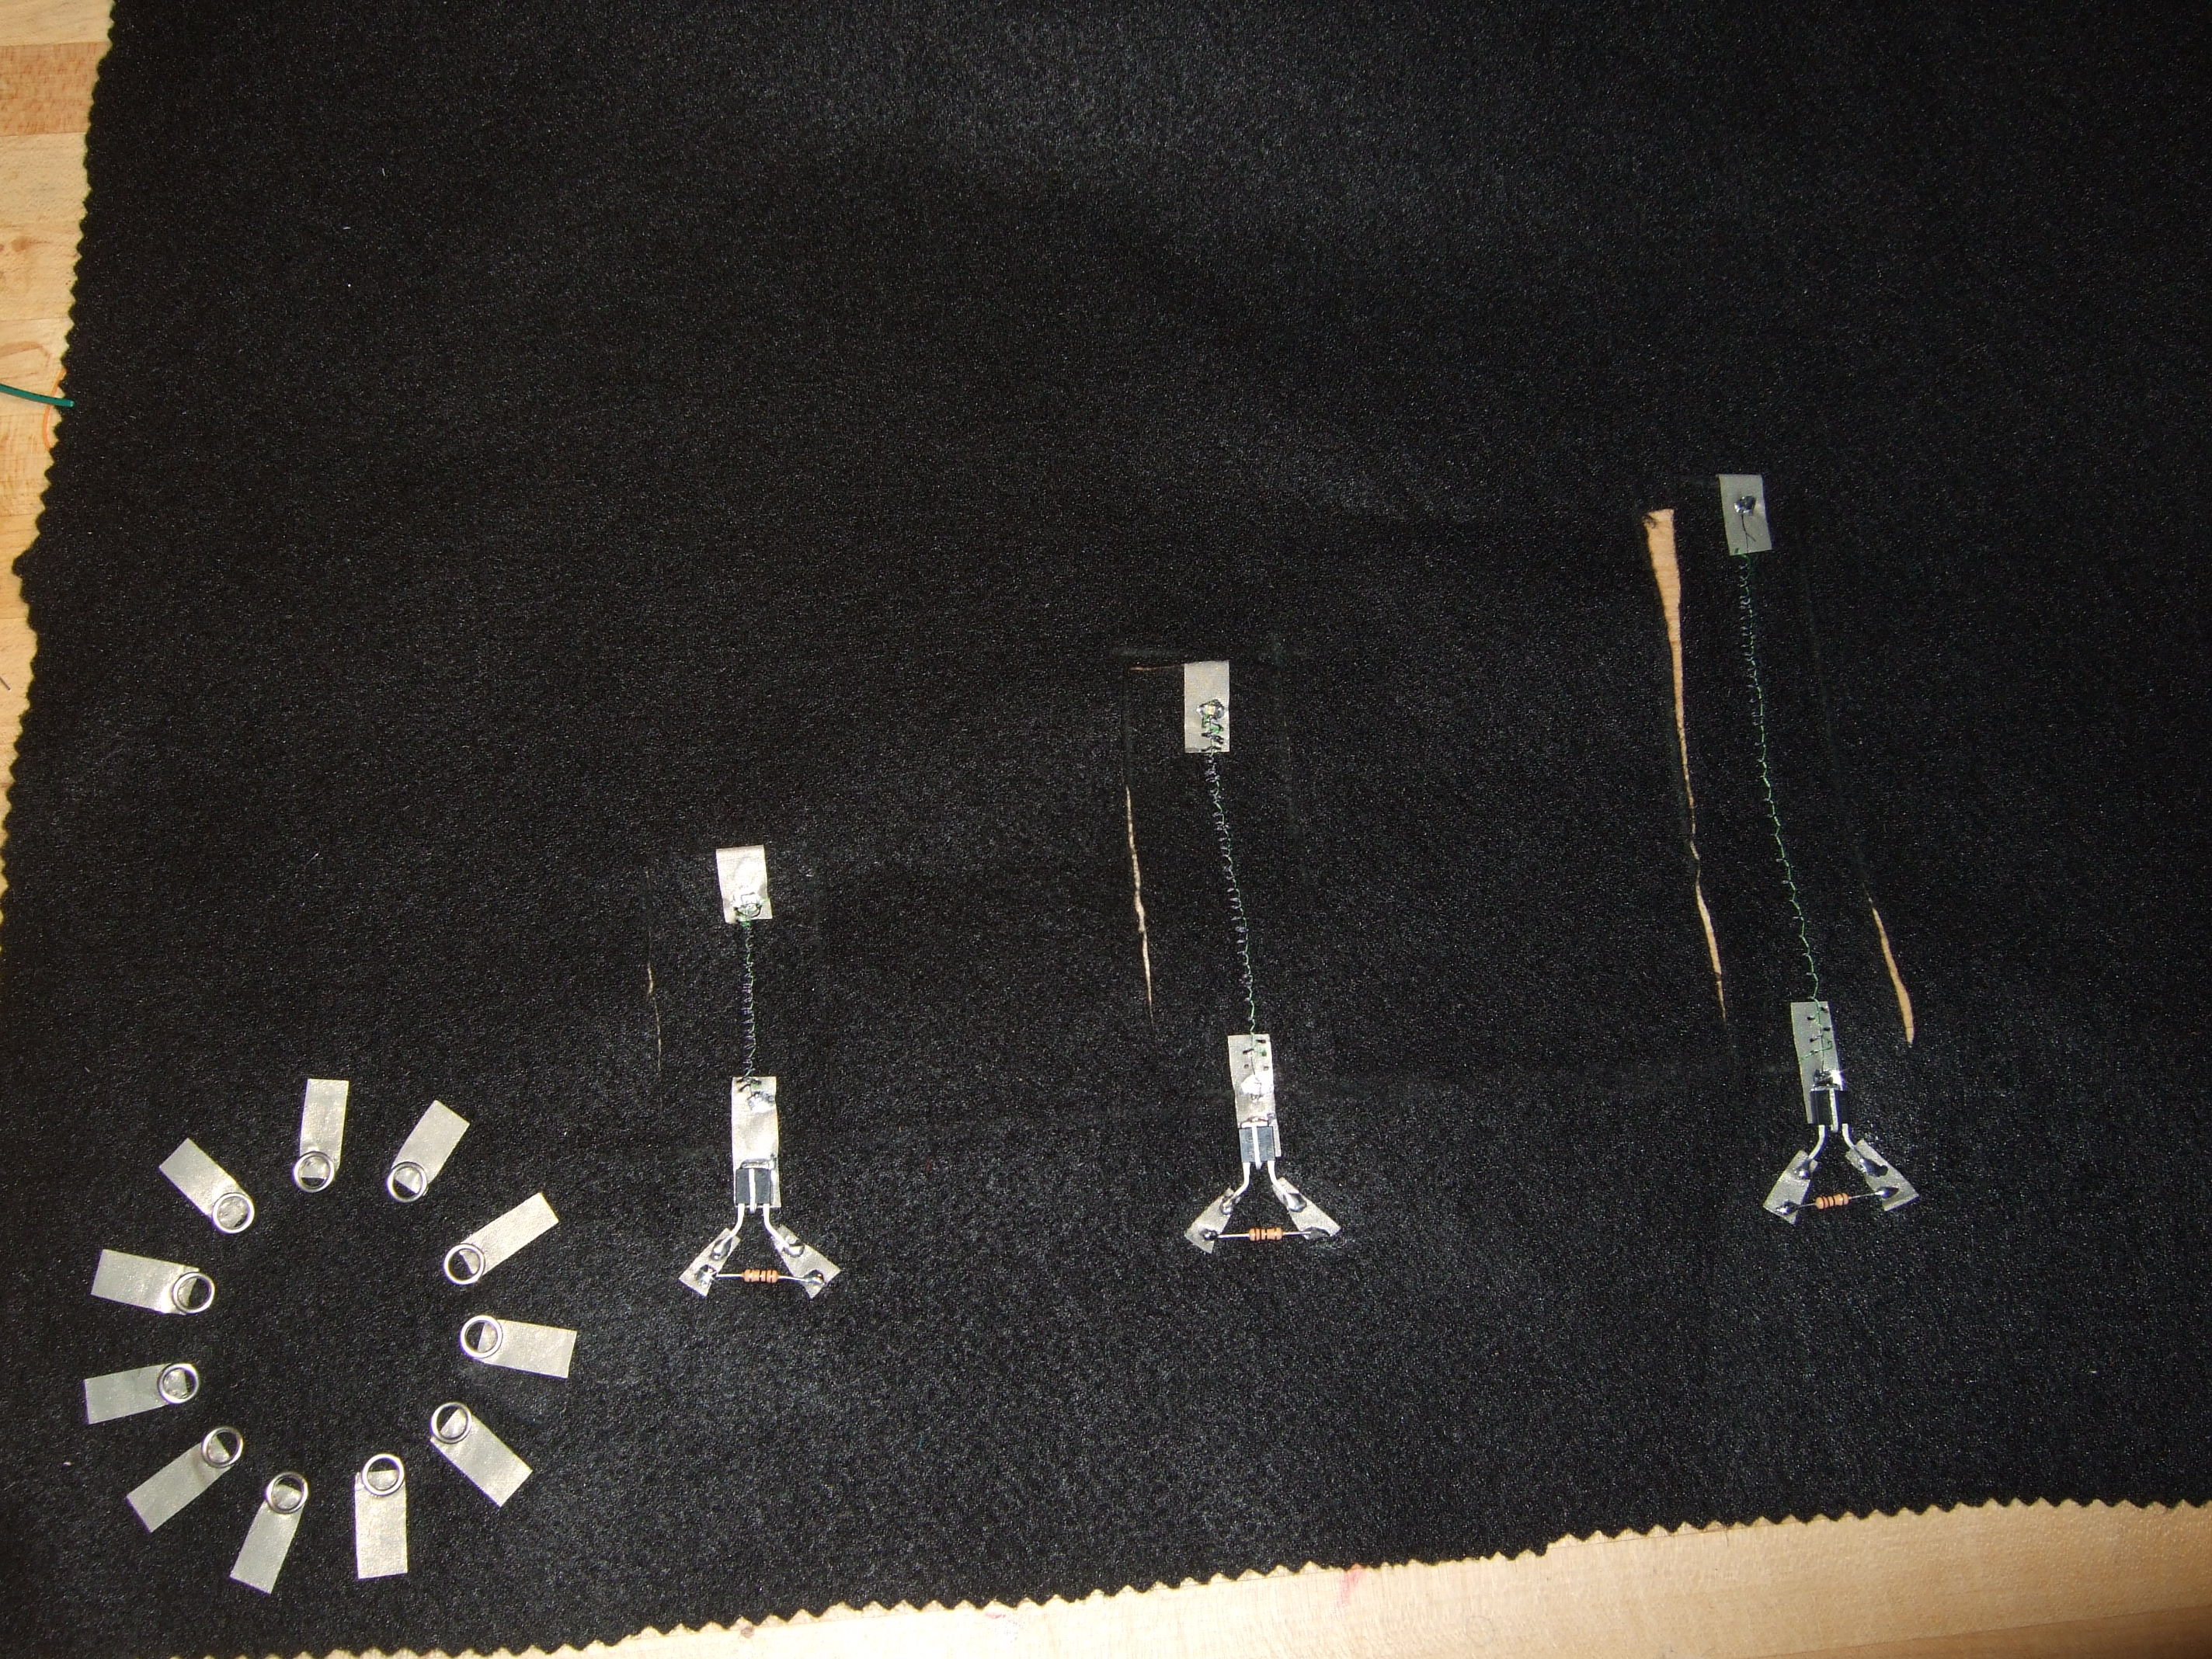
Photo showing all three nitinol strips, mosfets, and location of Arduino on the left
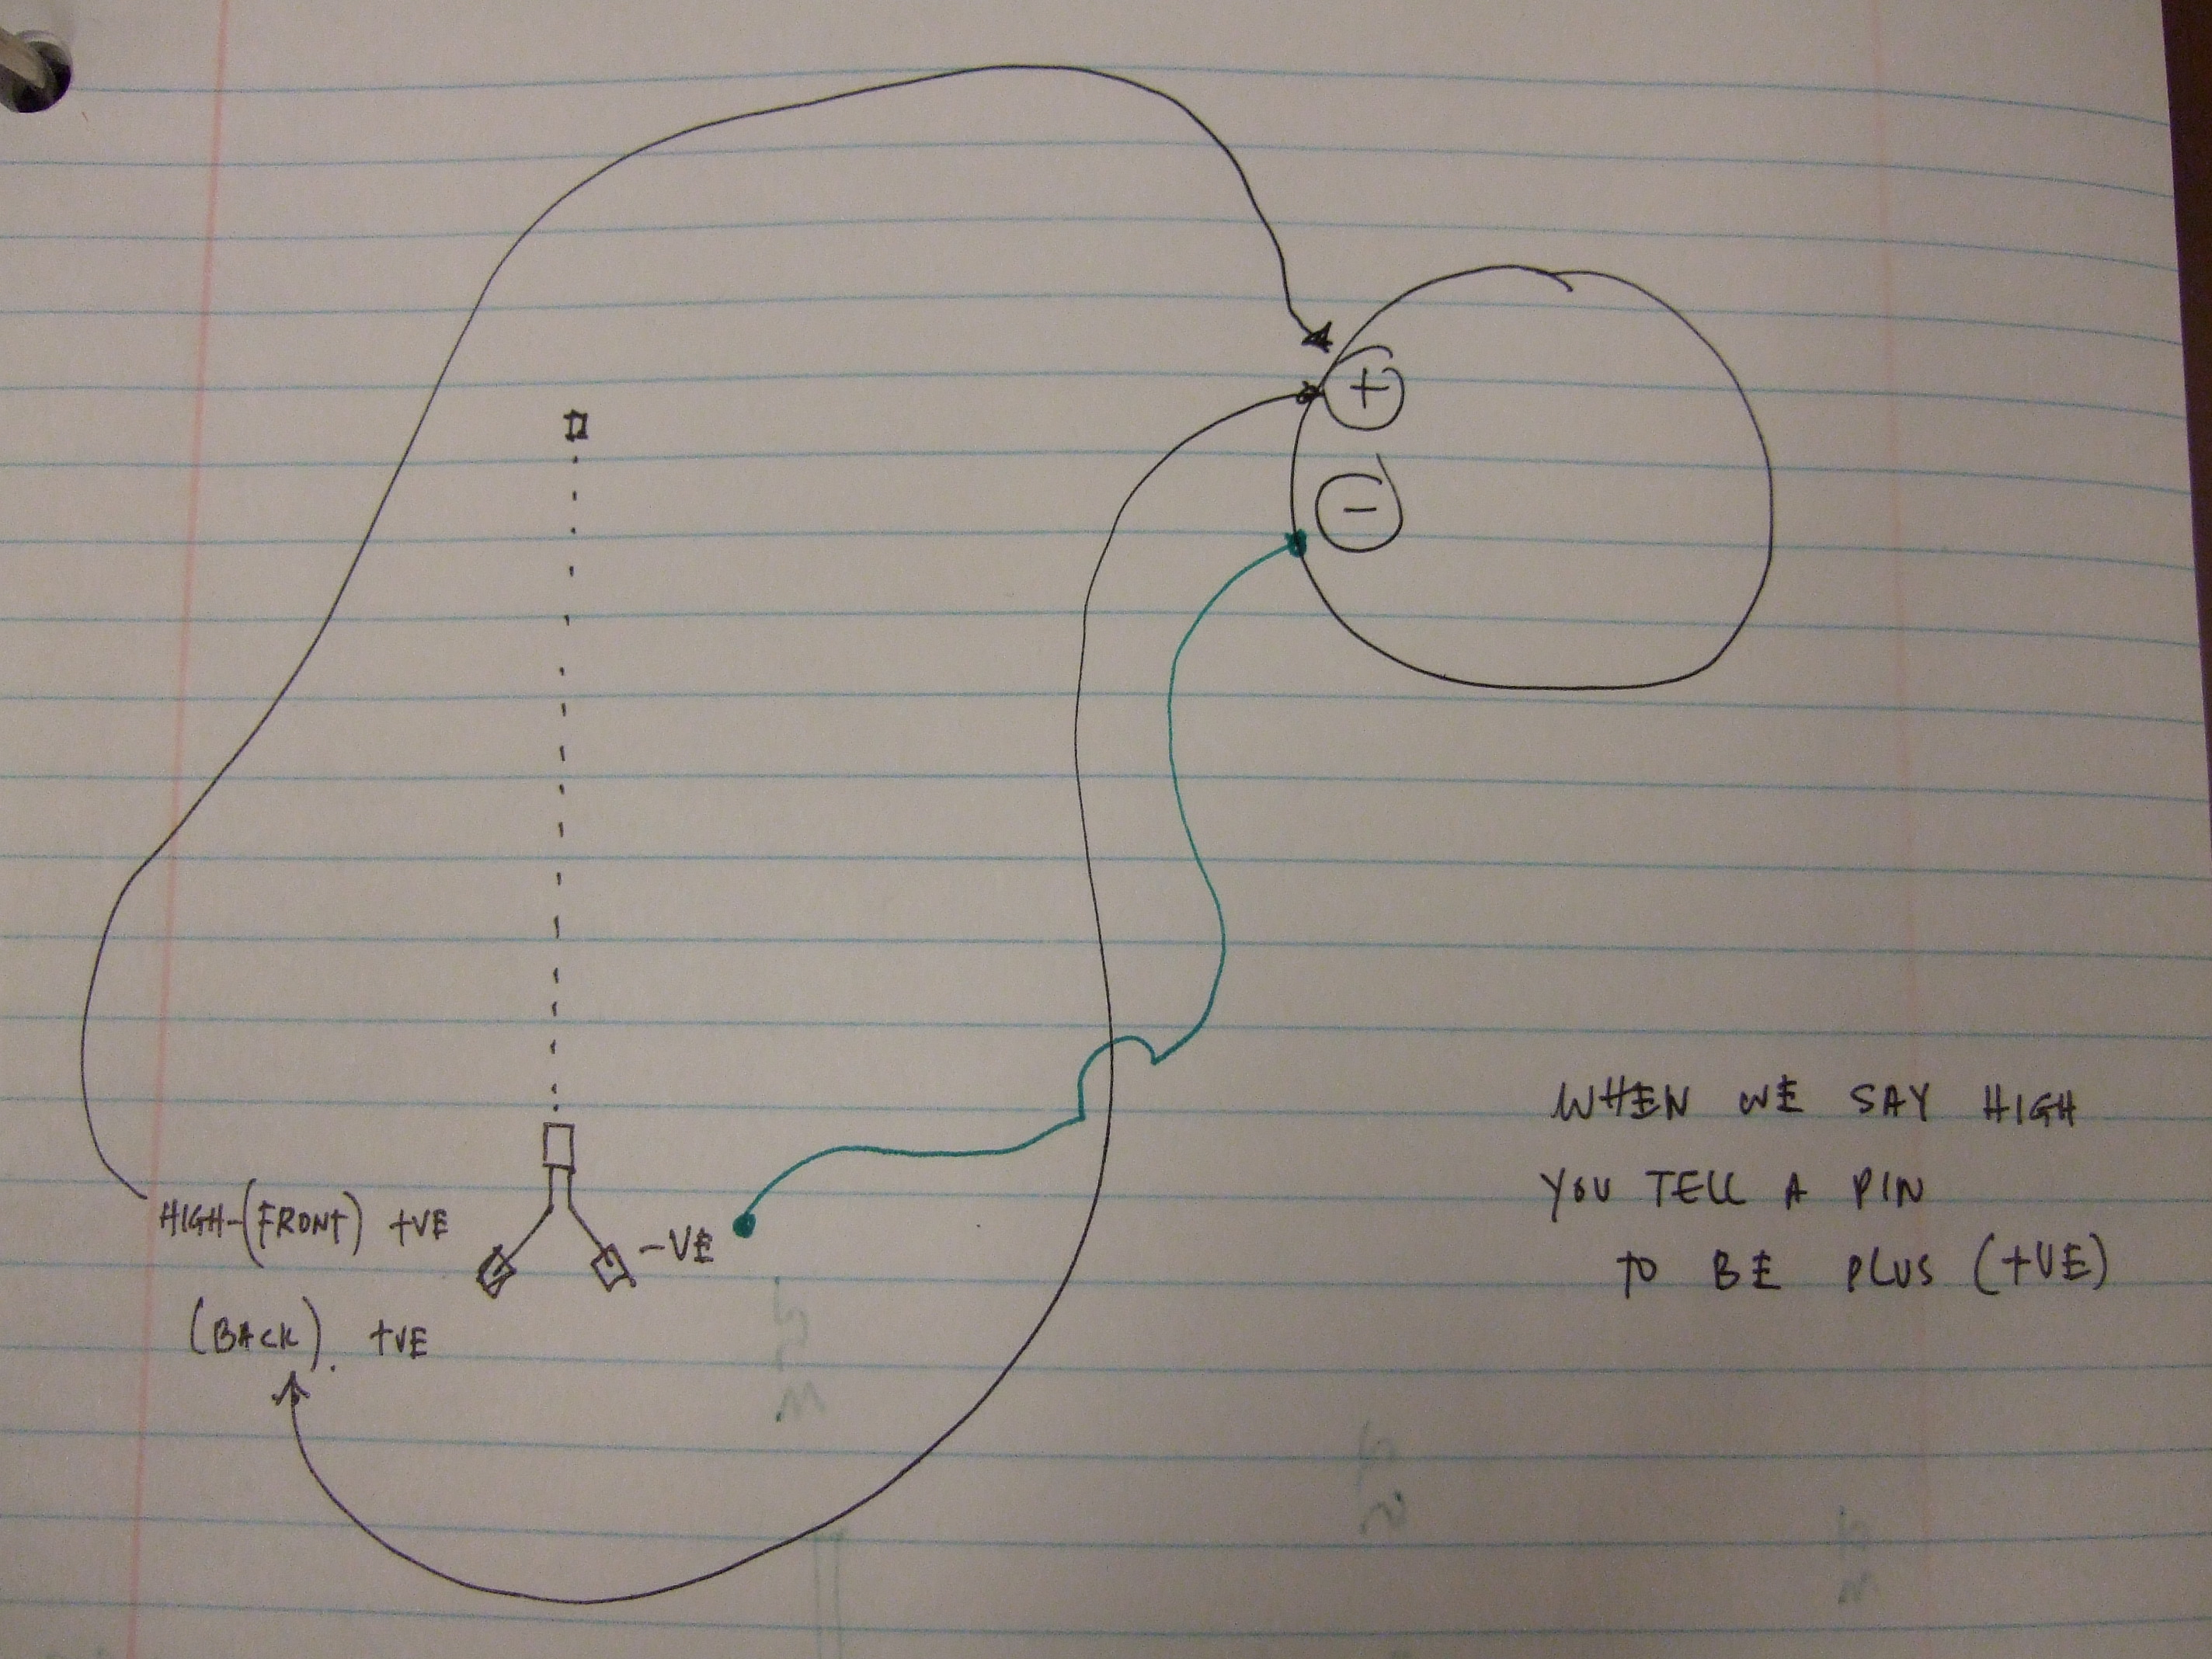
After stitching and soldering my main components, I troubleshooted my circuit. Above is a sketch of the connections I made to test. IT WORKED!!!
After checking the resistance of each nitinol strip – based on Leah’s advice – I realized that I was short of resistance and could run the risk of damaging my wire, and draining my battery. Using my multimeter I calculated the following:
Calculations
V = IR
Voltage = 3.7V (battery)
I = 400 mA (max. current for the .006″ wire)
R = 3.7V/ 0.4 A
R = 9.25 Ohms
|
|
Nitinol Strip A | Nitinol Strip B | Nitinol Strip C |
| Resistance (Ohms) measured | 6.2 | 4.2 | 6.0 |
| Additional resistance needed | 3.0 | 5.0 |
3.2 |
I had to add resistance to each circuit.
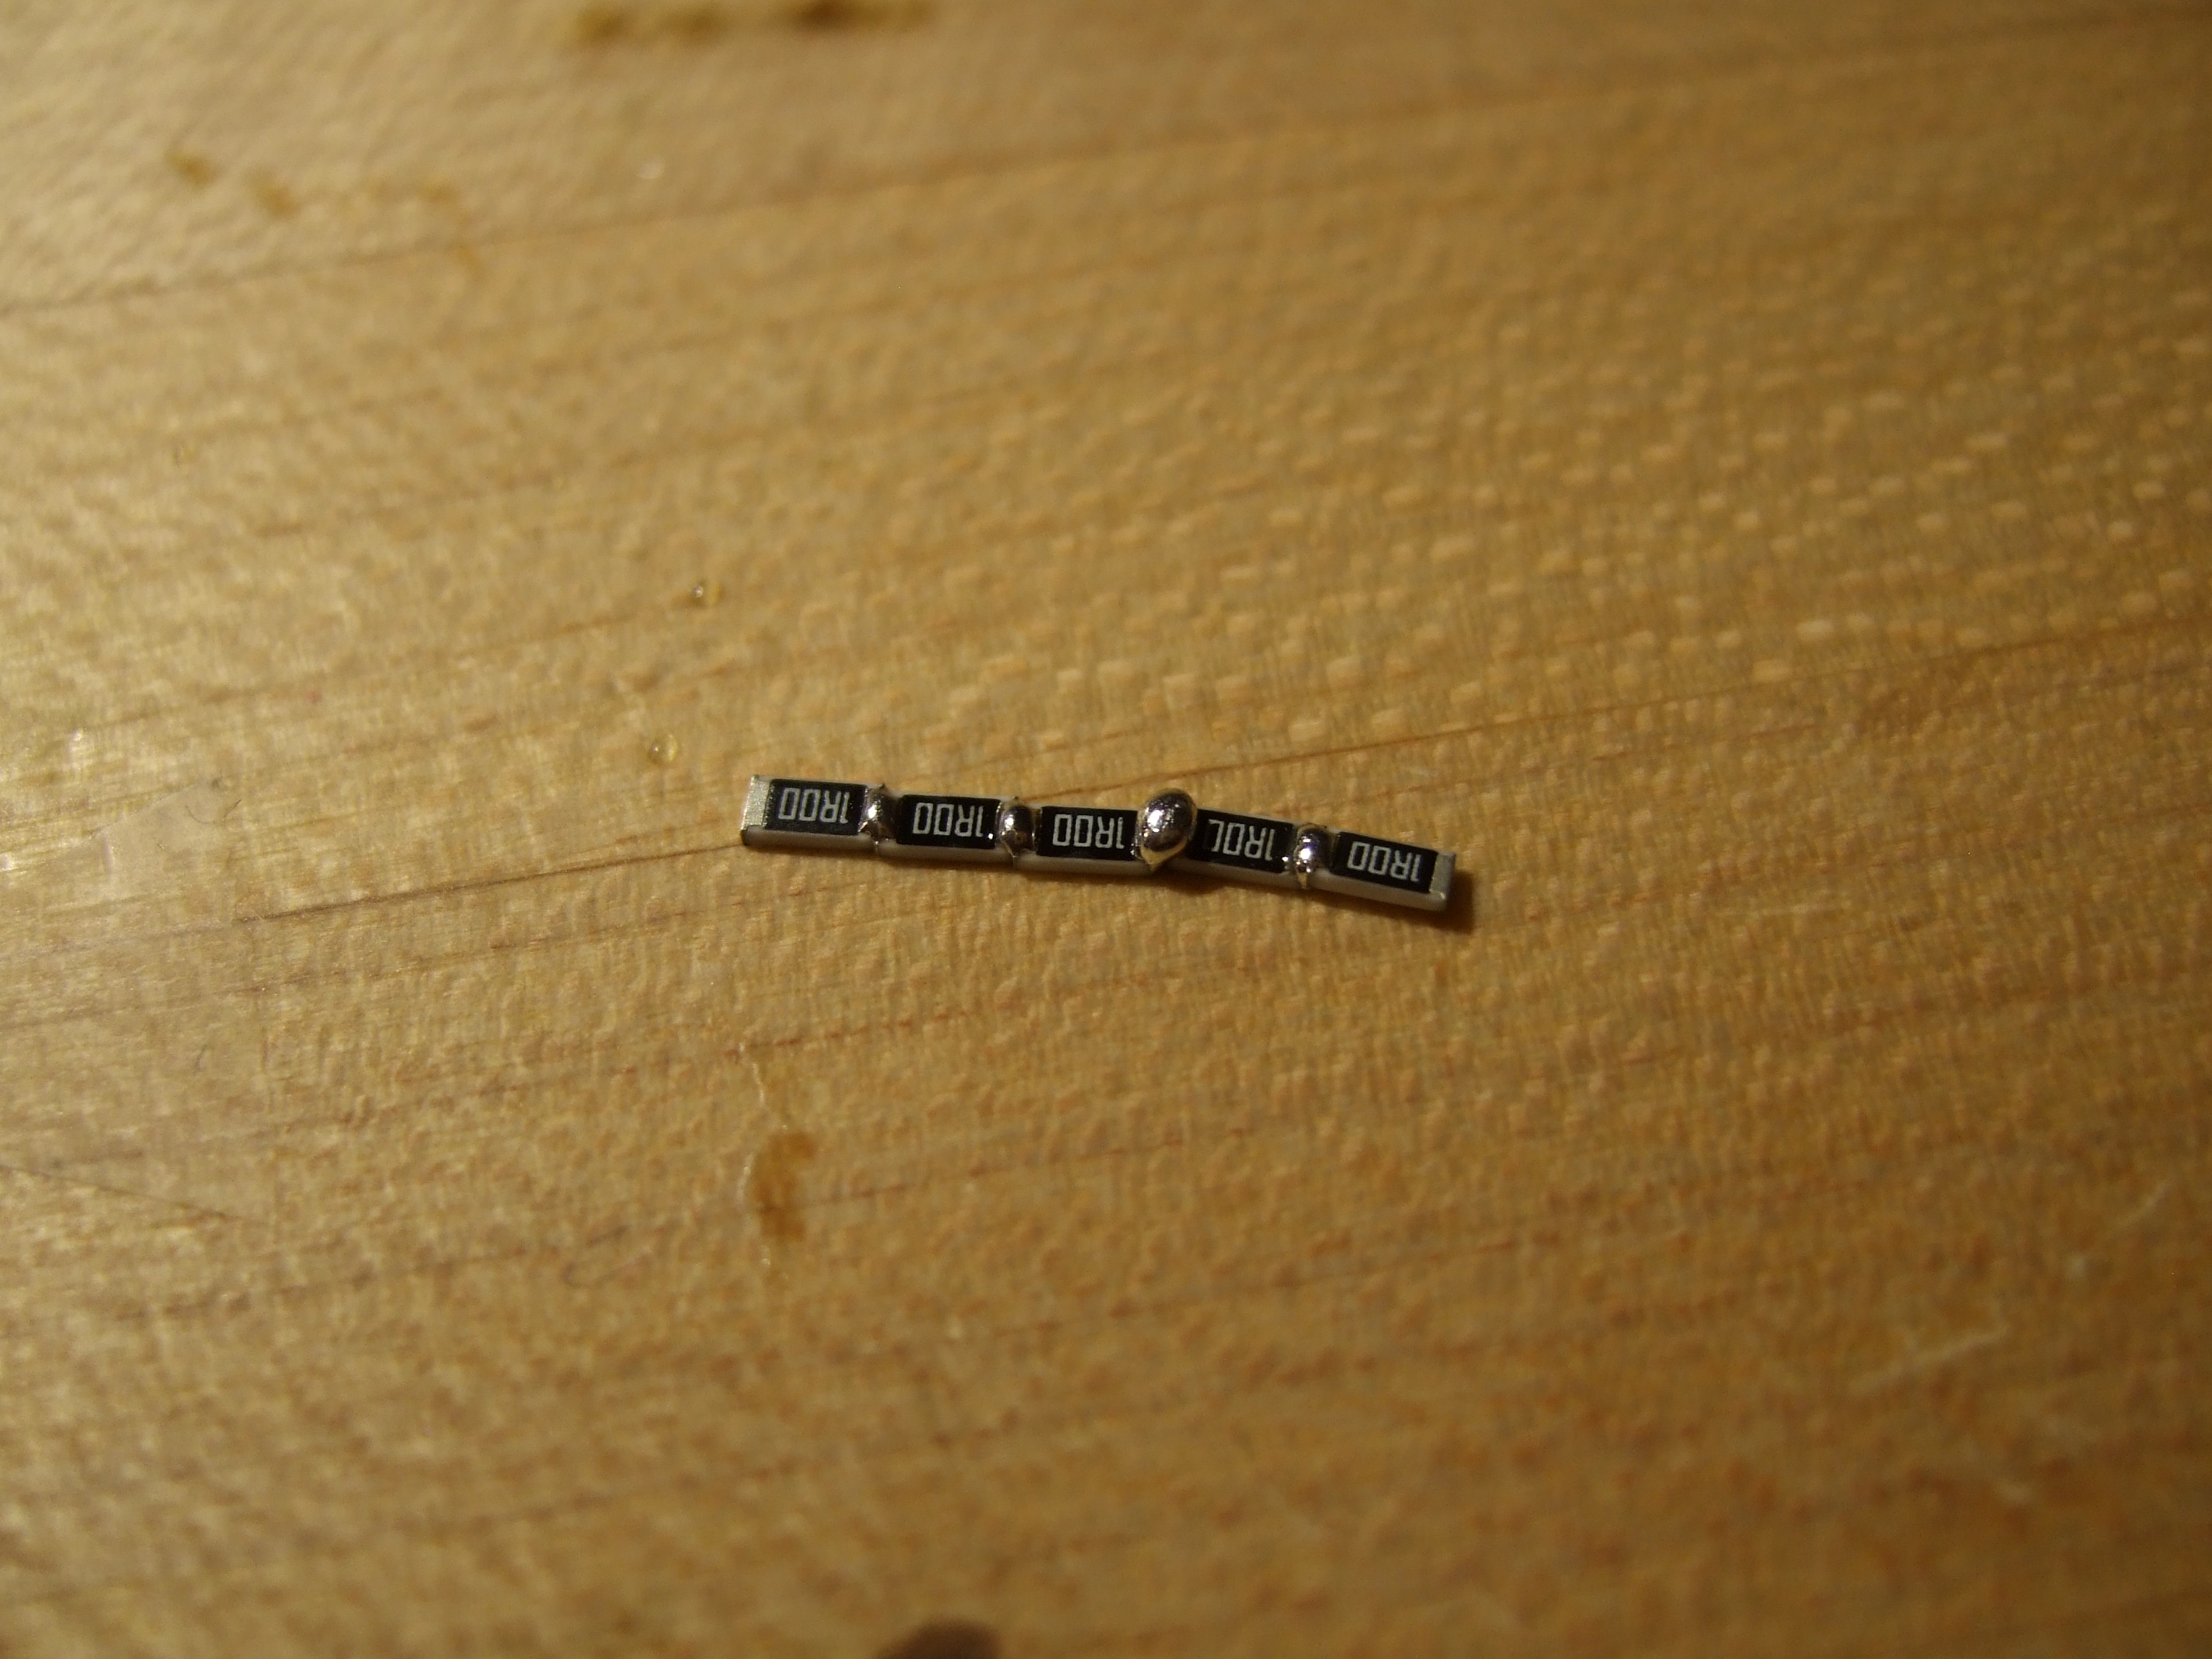
Above is a photo of what I did to add resistance. I decided to use 1 Ohm resistors that are soldered onto PCB Boards as this was a neater option. I added 3 or 5 together as needed and soldered to my circuit as shown below.
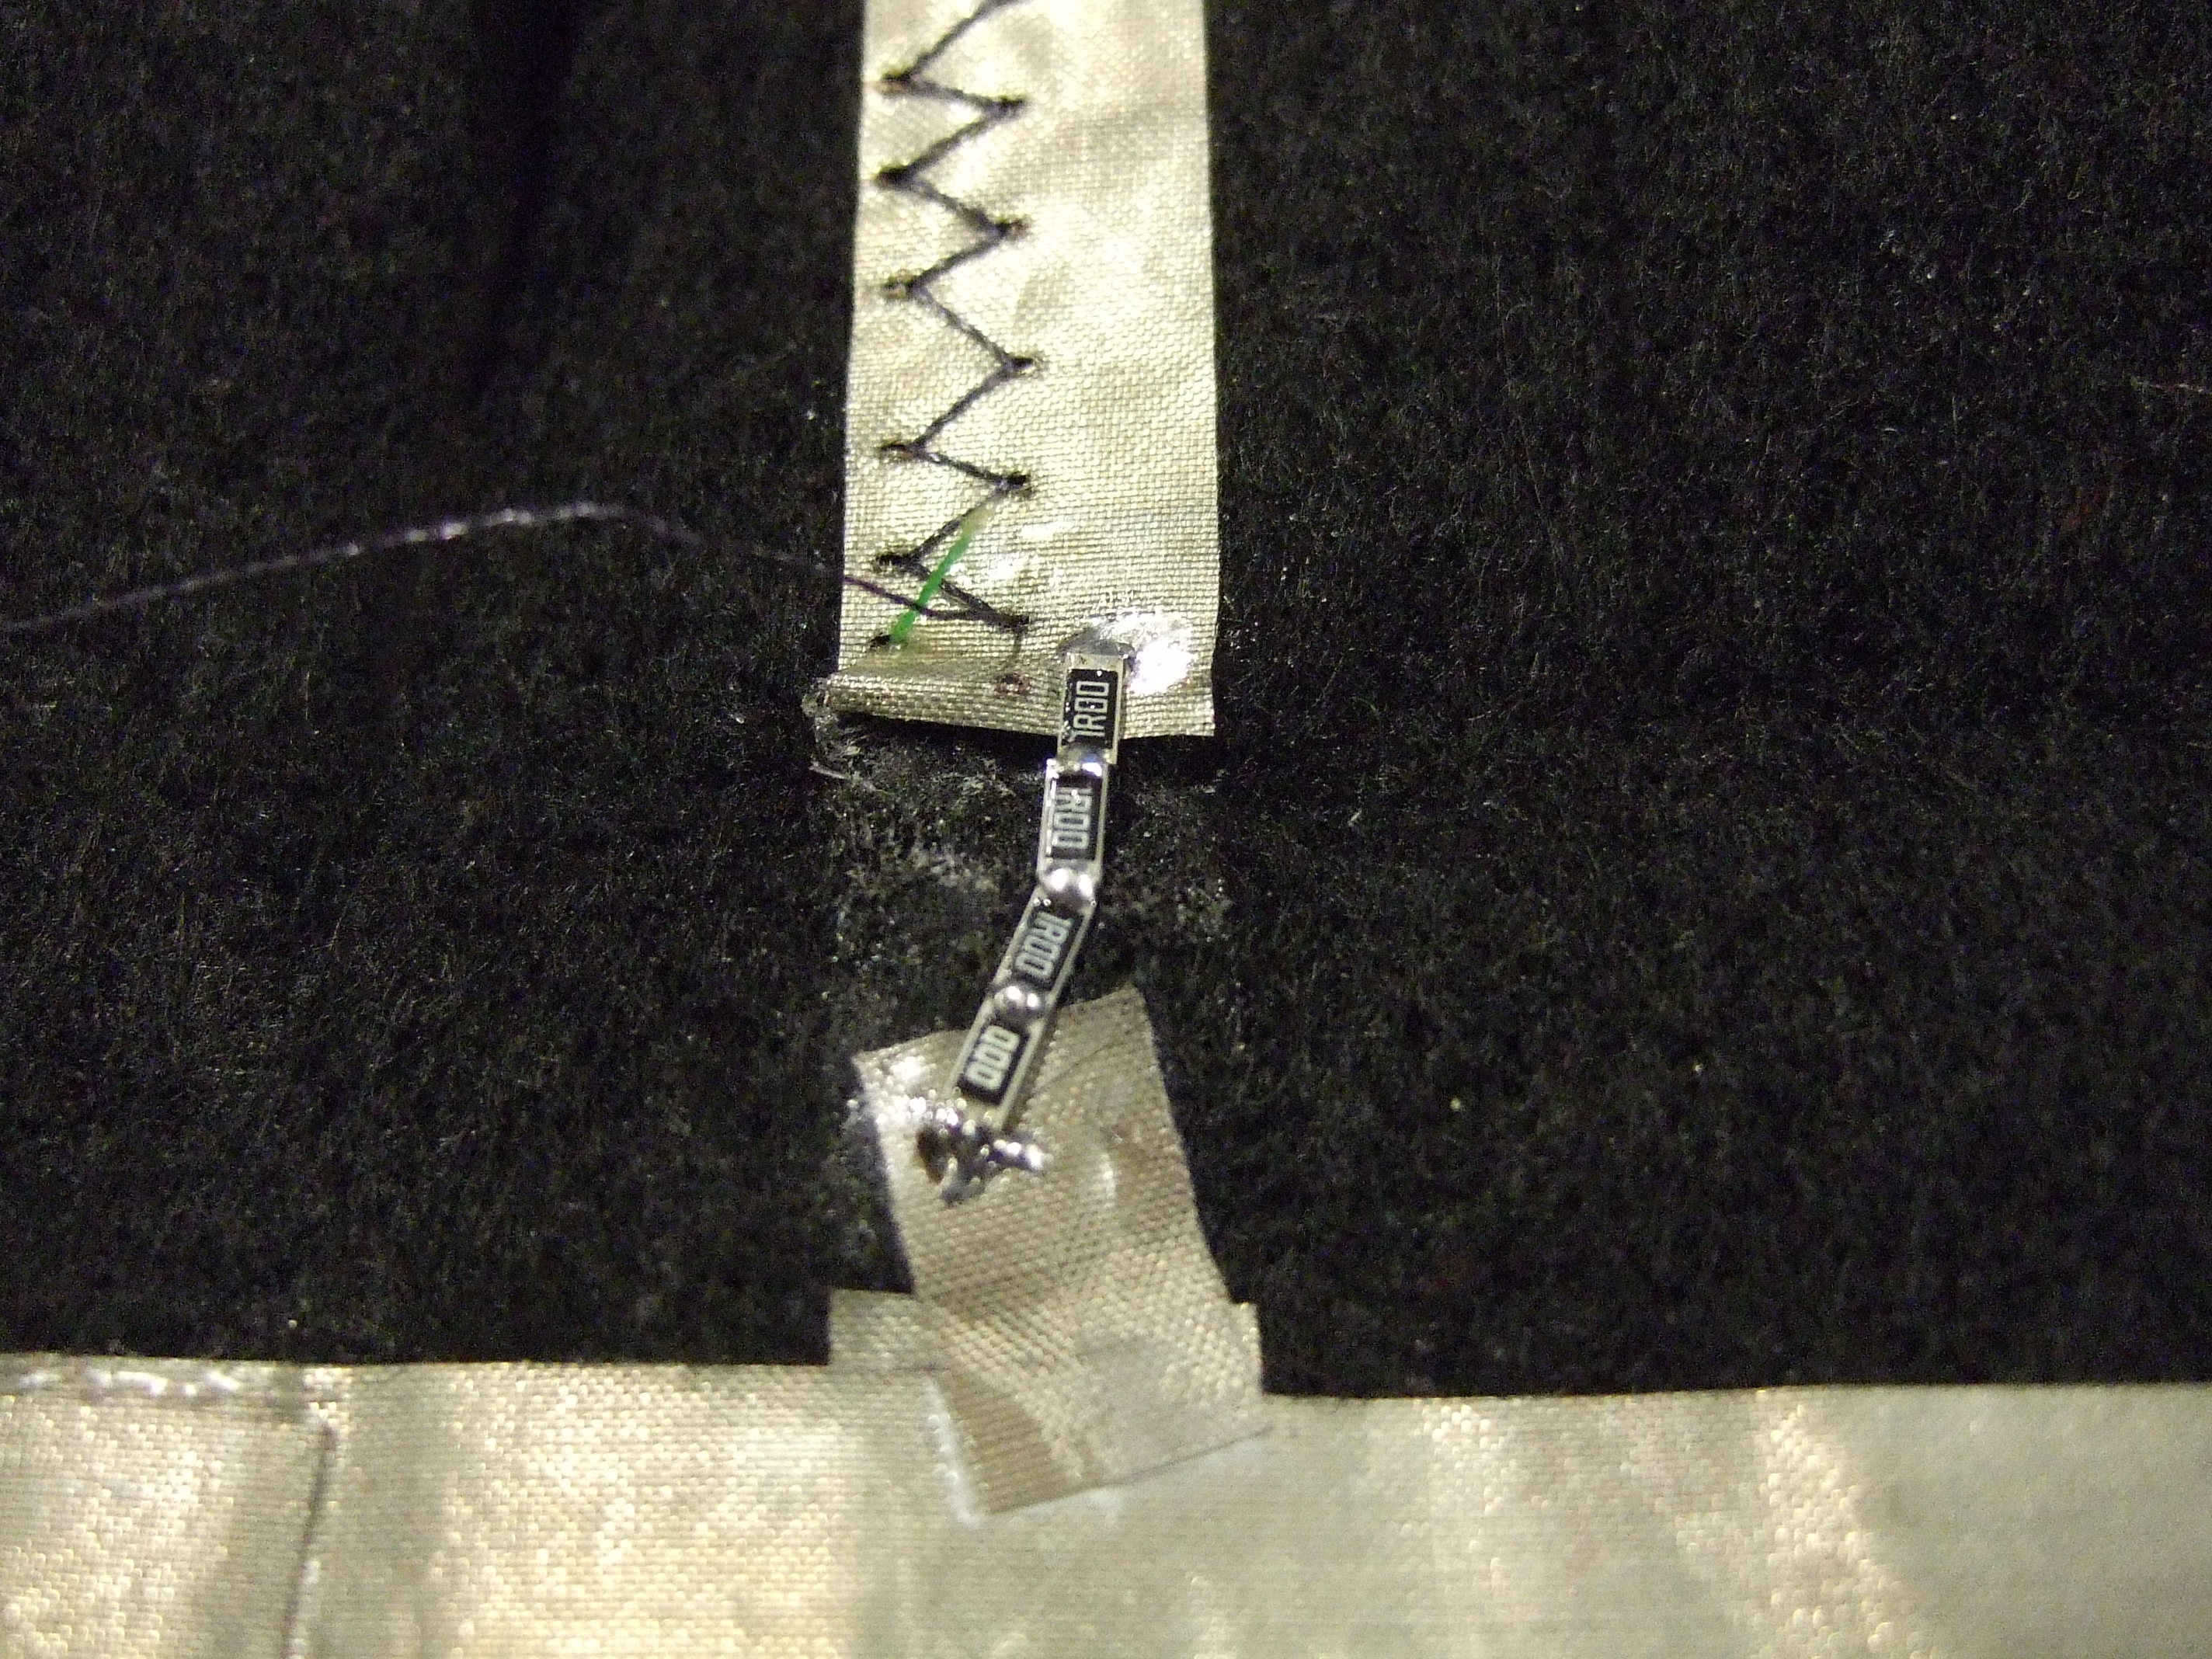
3 Ohms were needed here, but I added a 0 Ohm resistor to increase the length of the bridge.
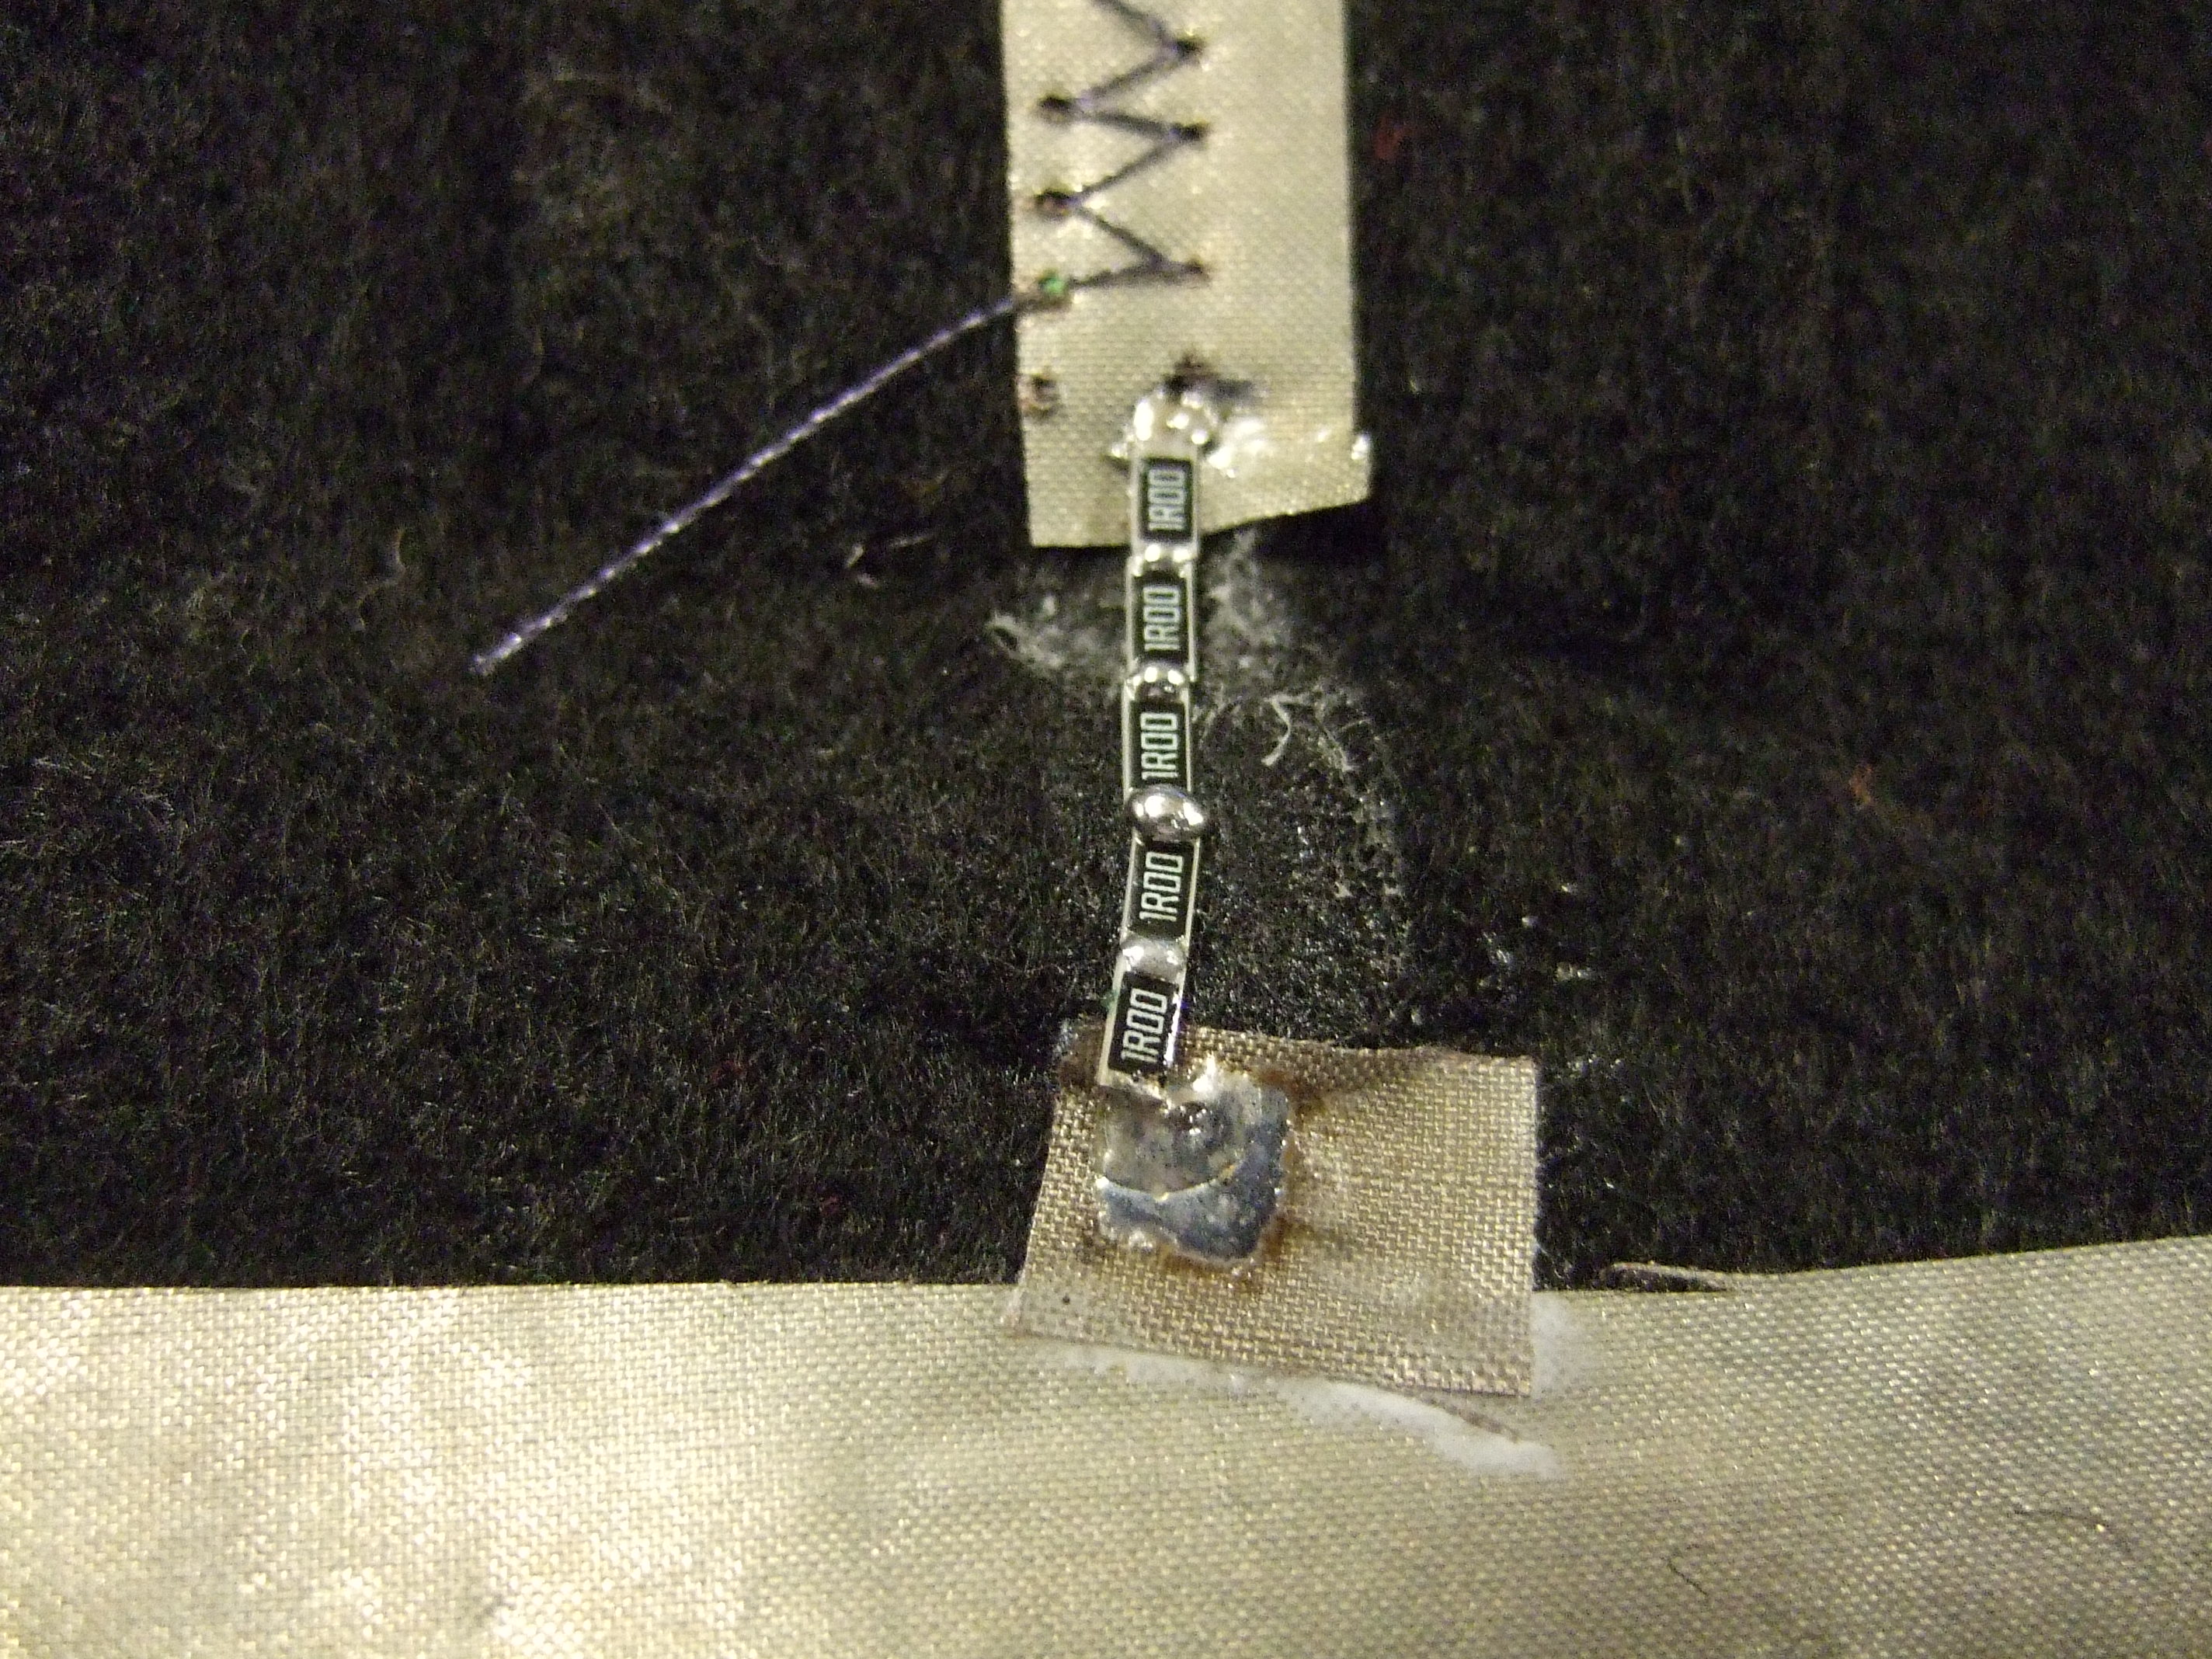
Resistance of 5 Ohms added
Arduino Code
int internalLED = 13;
int Nitinol1 = 5;
int Nitinol2 = 6;
int Nitinol3 = 9;

void setup() {
 // initialize the digital pin as an output.
 // Pin 13 has an LED connected on most Arduino boards:
 pinMode(internalLED, OUTPUT);
 pinMode(Nitinol1, OUTPUT);
 pinMode(Nitinol2, OUTPUT);
 pinMode(Nitinol3, OUTPUT);
}

void loop() {
 digitalWrite(13, HIGH);   // set the LED on
 delay(1000);              // wait for a second
 digitalWrite(13, LOW);    // set the LED off
 delay(1000);              // wait for a second
 digitalWrite(Nitinol1, HIGH);   // set the first leg on
 delay(1000);              // wait for a second
 digitalWrite(Nitinol1, LOW);    // set the first leg off
 delay(1000);              // wait for a second
 digitalWrite(Nitinol2, HIGH);   // set the first leg on
 delay(1000);              // wait for a second
 digitalWrite(Nitinol2, LOW);    // set the first leg off
 delay(1000);              // wait for a second
 digitalWrite(Nitinol3, HIGH);   // set the first leg on
 delay(1000);              // wait for a second
 digitalWrite(Nitinol3, LOW);    // set the first leg off
 delay(1000);              // wait for a second
}