See-shell move
by yihyun.lim
After multiple failed attempts of making other nitinol-based kinetic textile project, I tried making a small shell-shaped wearable brooch using felt and nitinol (shape changing alloy). Below are pictures of the first project I tried before moving on to the shell project.
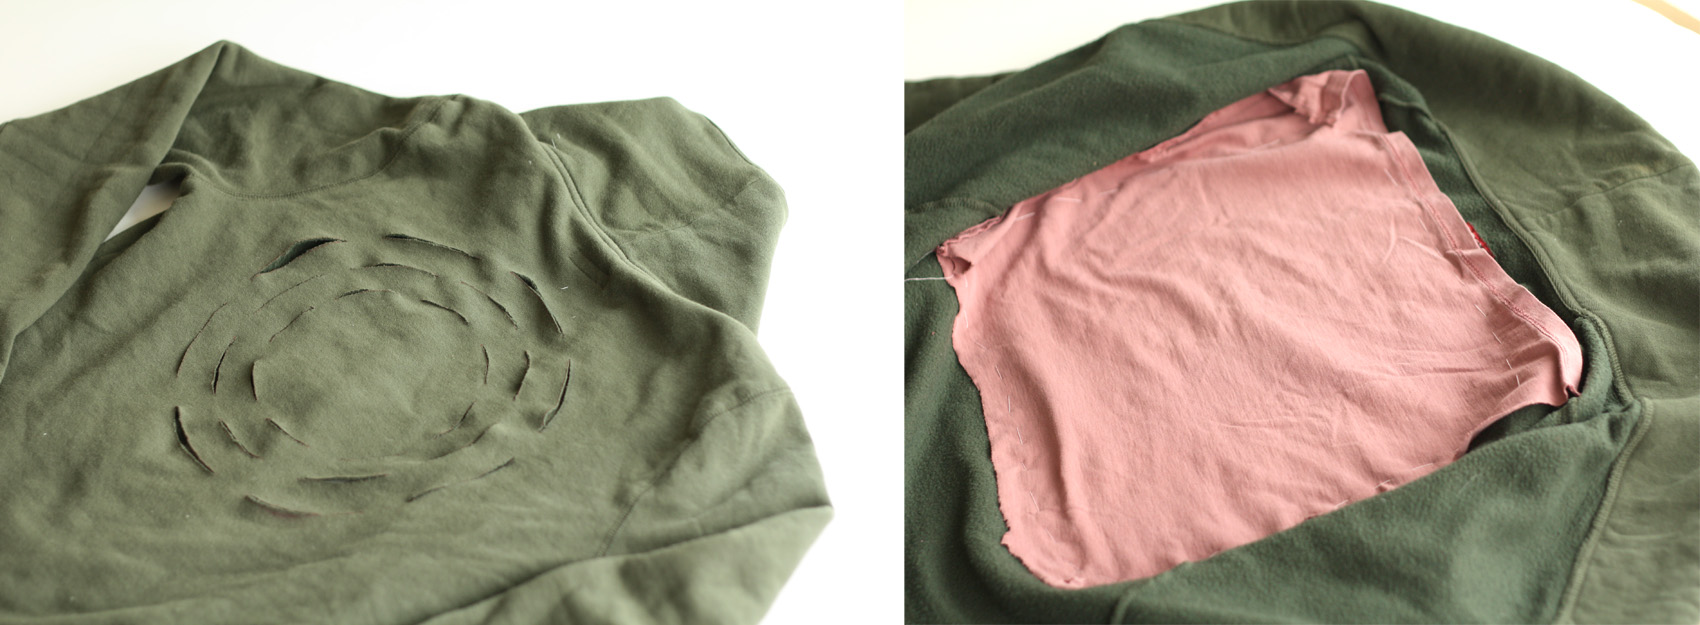
attempt 1 -pinwheel jacket
The idea was to use the nitinol to pull the fabric from the center of the pattern to expose the color beneath the green fabric. I tested multiple ways of using nitinol. First was to pull in a radiating pattern from the center, as shown in the picture on the left. The nitinol didn’t provide enough tug pull, and also the fabric of the jacket itself (jersey) was too stretchy, and it seemed that the pull action from nitinol was all absorbed by the fabric.
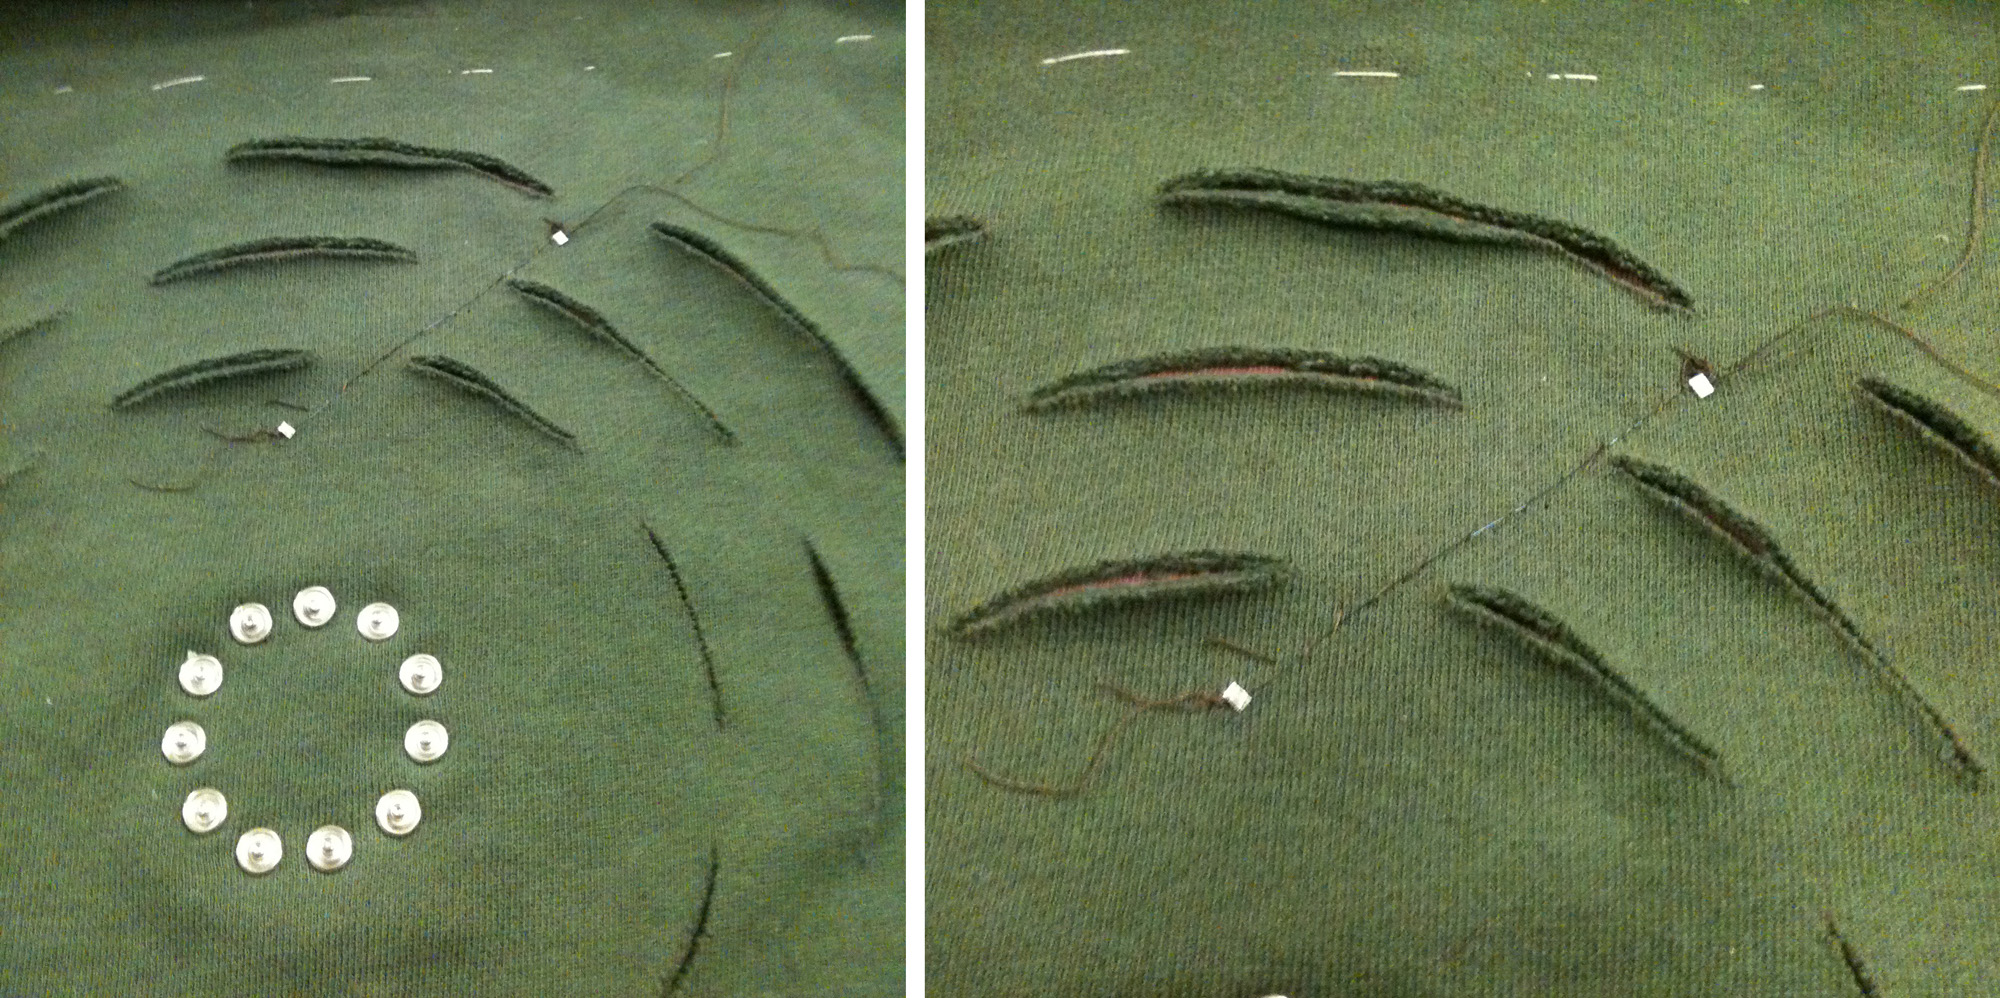
In the next test version, I added stiffness to the jersey fabric at pull-locations by using iron-on paper/cotton fabric. I tried pulling in a triangulated pattern, and also in a radial pattern. Both didn’t seem to work well. The raw edges of the jersey fabric started to curl as well, and it was hard to read the nitinolpull action. I decided to abandon this fabric and use a stiffer fabric for the next test.
.
.
.
attempt 2 – talking fabric
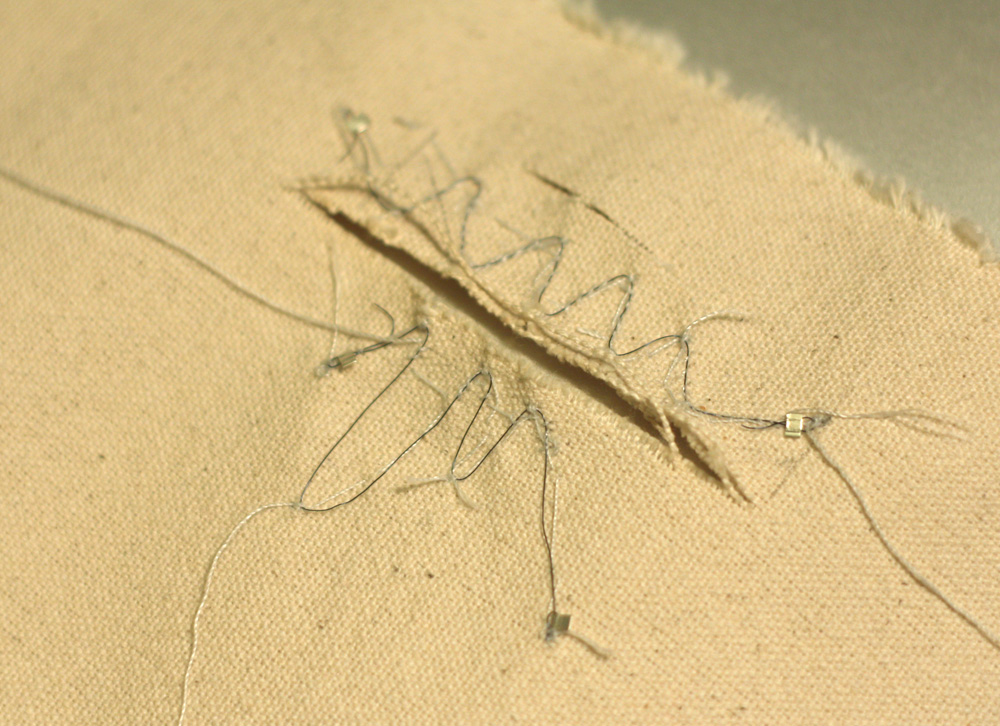
In the next test, I tried to use nitinol to move the slit as if the fabric was talking (moving its “lips”). I sewed down the nitiol on the top lip, and zigzaged the nitinol all the way across the slit. That did not seem to pull much. So on the bottom lip, I used nitinol only on the mid portion of the length and did not sewed down the nitinol. It seemed to work better. But I wanted to create more dramatic effect, so I decided to make another one.
.
.
attempt 3 -seashell
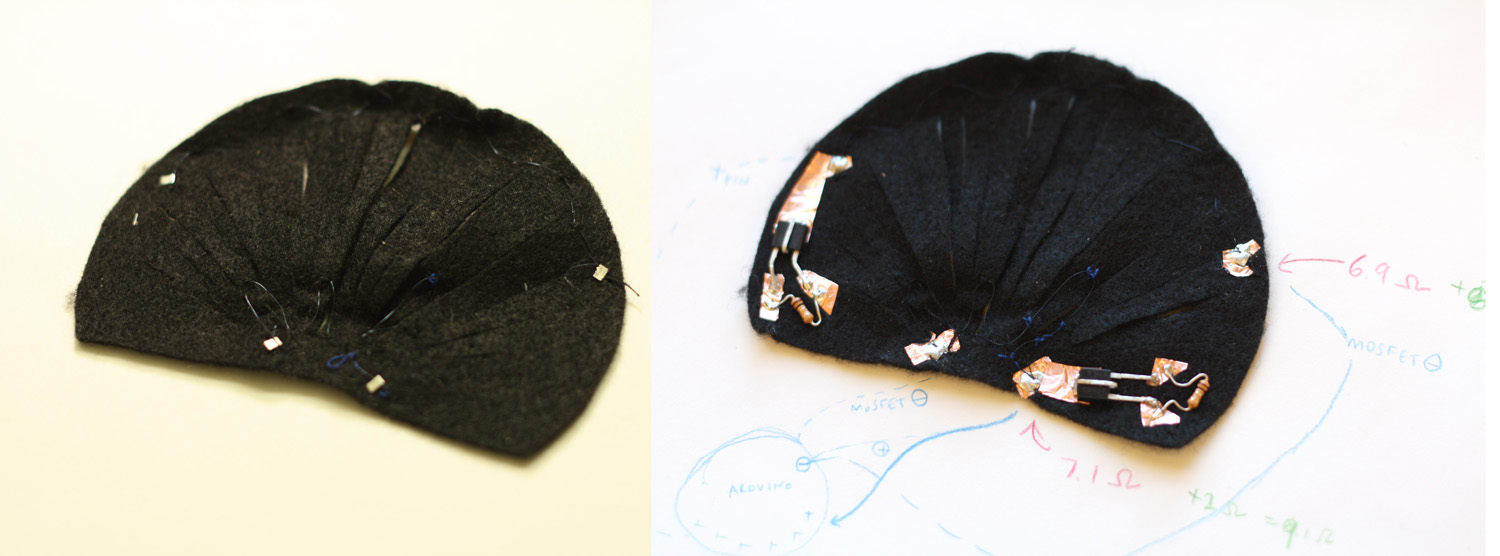
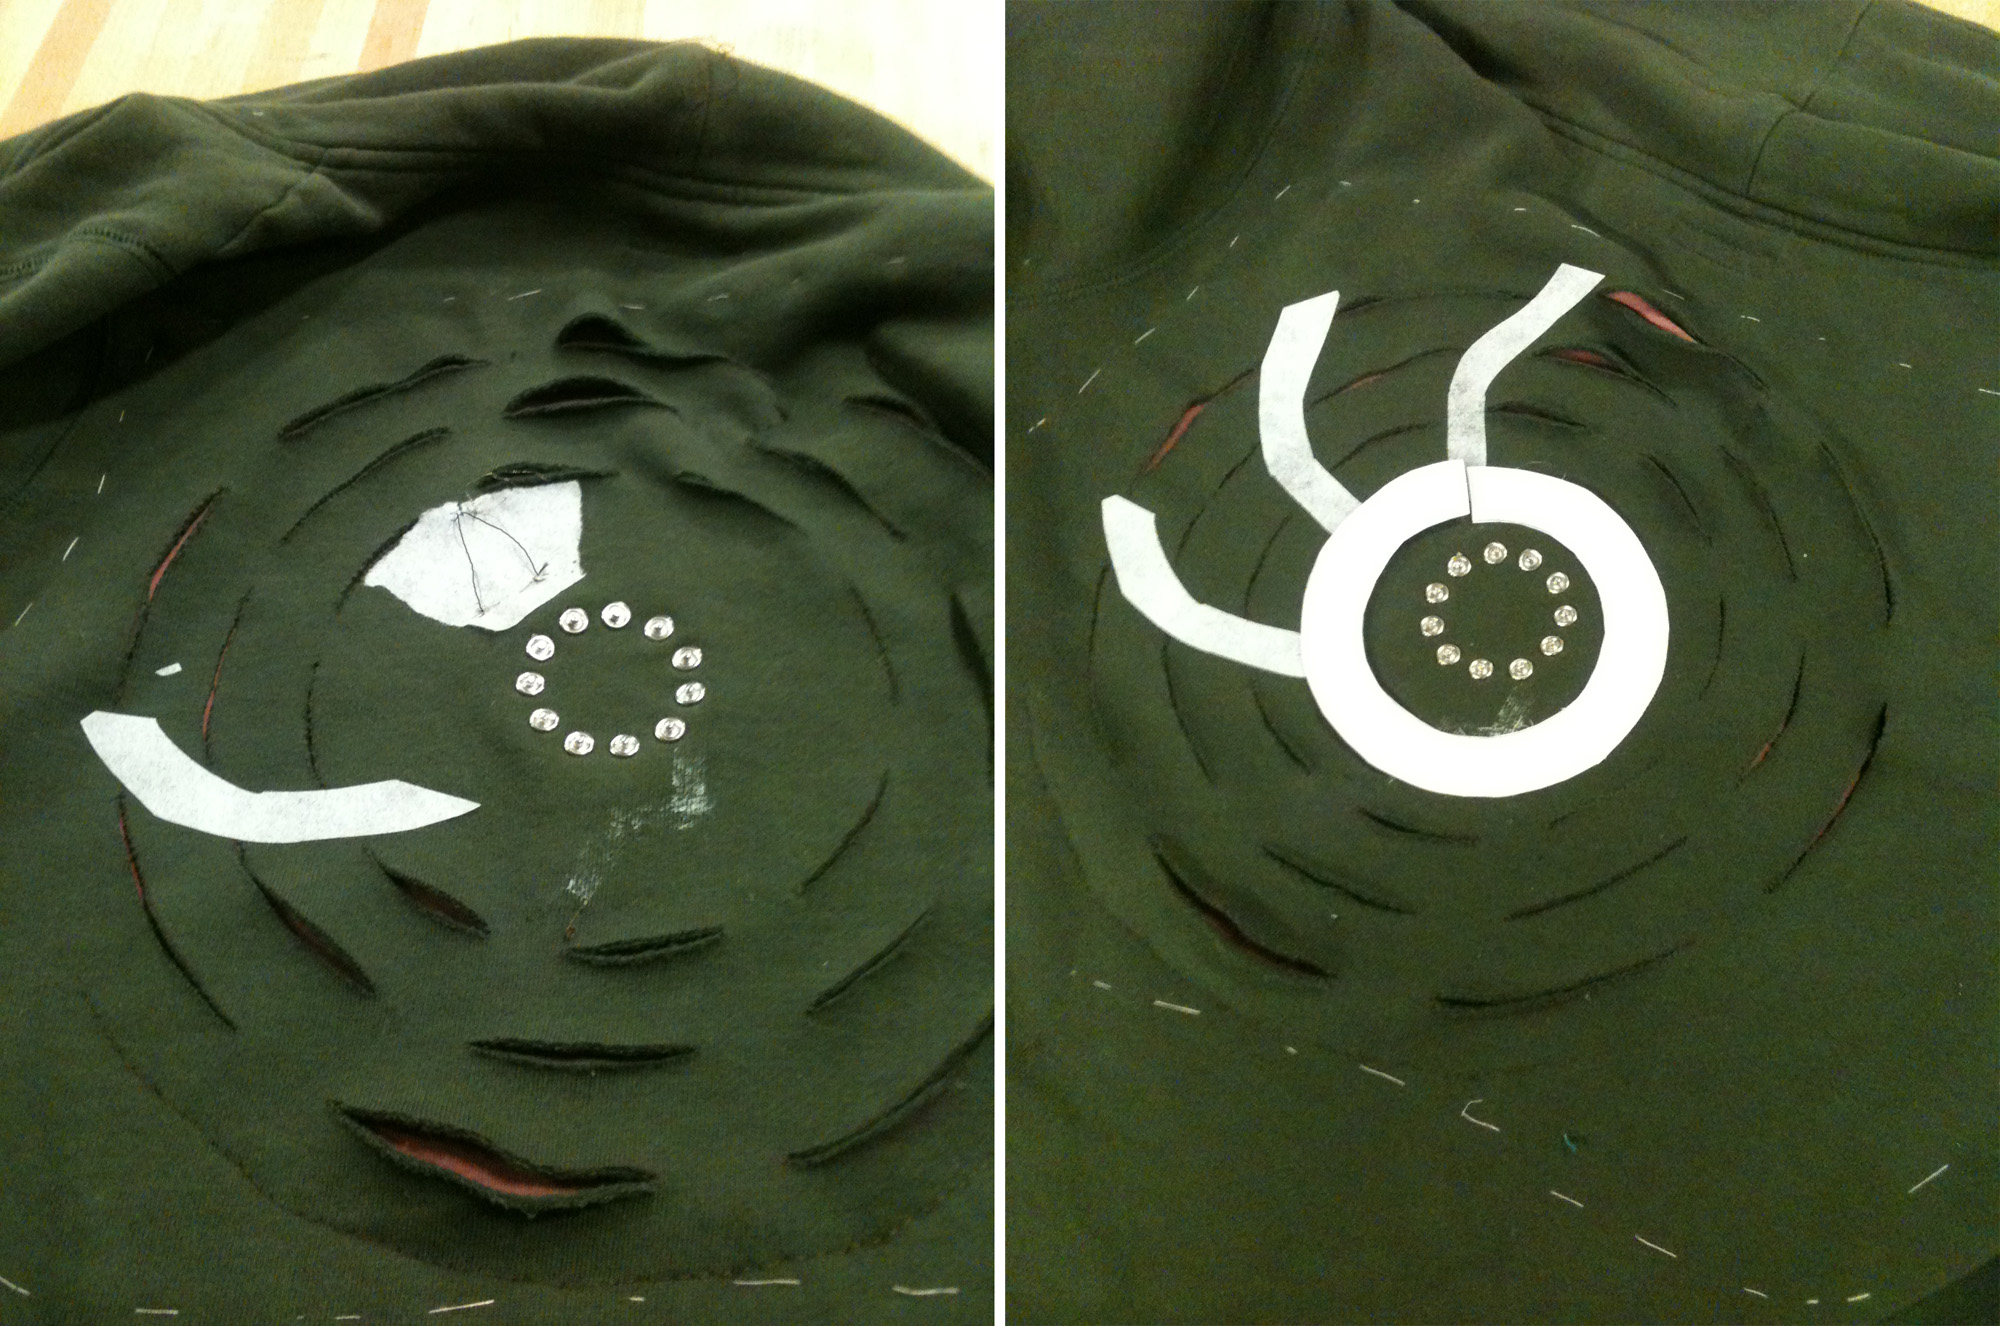
In this version, I made multiple cuts and sewed two separated pieces of nitinol. It’s a bit difficult to see in the picture, but there is one nitinol at the top, and another one at the bottom (both are zigzaging). Each nitinol has its own mosfets, and given the thickness of nitinol, I needed to provide 380mA~440mA to activate. Measurement showed 6.9 ohms for the top one, and 7.1 ohms for the bottom one. I added two 1 ohm resisters (mini rectangular shaped resistors) for each of the nitinols to get 9 ohms of resistance on each nitinol.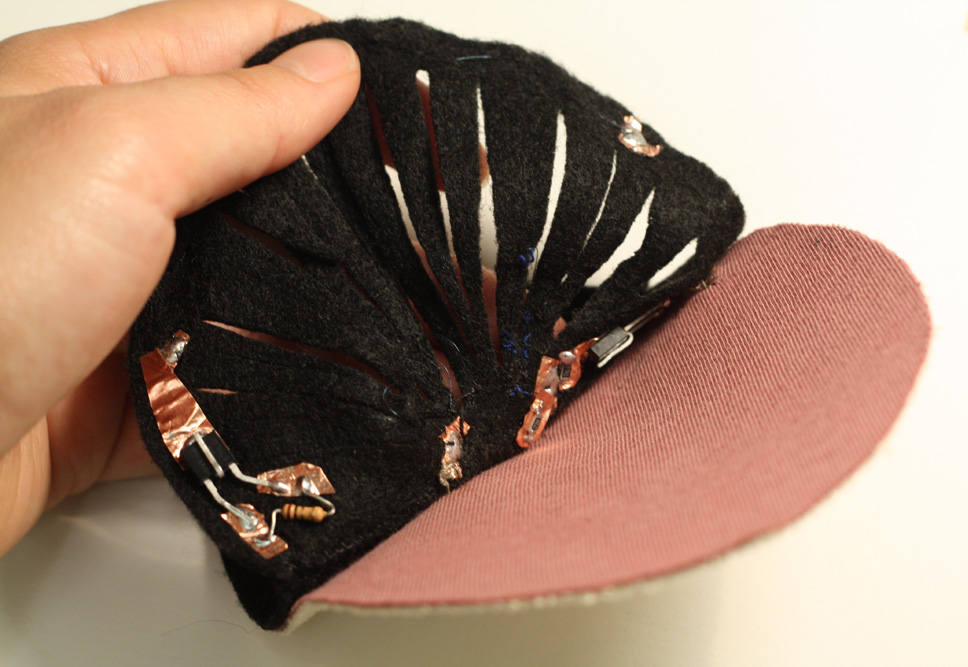
I made a simple on-off switch with copper tape and sewed it securely to the bottom flap of the shell. After connecting everything I hooked it up to arduino and ran the code. Hmmm.. it didn’t seem to work. The problem seems to be that I used conductive thread to connect to arduino instead of wire. Going back to debug/fix. Meanwhile it worked with the heatgun, but not as dramatic as I hoped it to be. Video is at the top of this post.