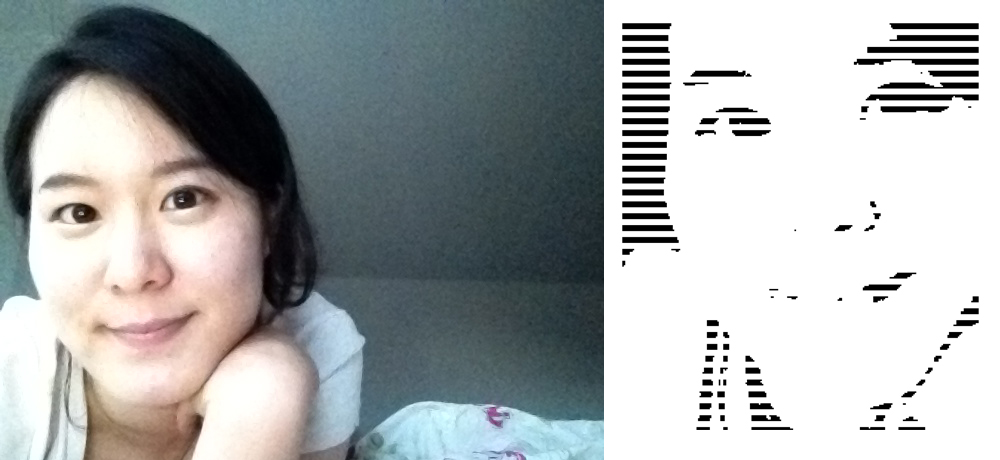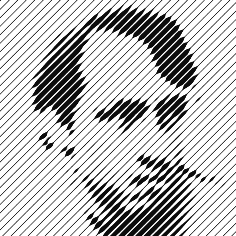
While I was searching for pattern codes and inspiration images, I came across this line-art image (a profile “photo” of this person’s website :http://nwerneck.sdf.org/). The dashed hatch line thickens and thins in this image, and I thought it could be a perfect embroidery patter with a mixture of lines and fills. It also seems to be computer generated, and I could sketch out a possible line of Processing in my head. Load image -> filter image (black and white) -> analyze pixels -> draw lines -> make lines thicker where black pixels are -> print to pdf . Voila! Now with my limited Processing skills….
I started by digging into Processing book and website for sample codes as a starting point. I grabbed the “Writing to another PImage object’s pixels” code from here, and made slight modifications. Although I knew what I wanted to do next (take pixel data and thicken series of line at specific pixel points, for example), I wasn’t able to get exactly what I had envisioned. Instead, I decided to make it graphically similar: I drew thick white lines on top of the image via Processing. Then I was able to export the image to PDF and make some Illustrator adjustments such as merging, trimming lines before I took it to the embroidery machine.
Below is the code I put together to covert an image (You can grab the code and load any image).
______________________
import processing.pdf.*;
PImage source; // Source image
PImage destination; // Destination image
void setup() {
size(420, 420);
beginRecord(PDF, “yihyun.pdf”);
smooth();
fill(0);
strokeWeight(4);
stroke(255);
noLoop();
source = loadImage(“yihyun.JPG”);
// The destination image is created as a blank image the same size as the source.
destination = createImage(source.width, source.height, RGB);
}
void draw() {
{
float threshold = 170;
// We are going to look at both image’s pixels
source.loadPixels();
destination.loadPixels();
for (int x = 0; x < source.width; x++) {
for (int y = 0; y < source.height; y++ ) {
int loc = x + y*source.width;
// Test the brightness against the threshold
if (brightness(source.pixels[loc]) > threshold) {
destination.pixels[loc] = color(255); // White
} else {
destination.pixels[loc] = color(0); // Black
}
}
}
// We changed the pixels in destination
destination.updatePixels();
// Display the destination
image(destination,0,0);
}
for (int x = 0; x <=500; x +=8){
line(0, x, width, x);
}
endRecord();
}
______________________
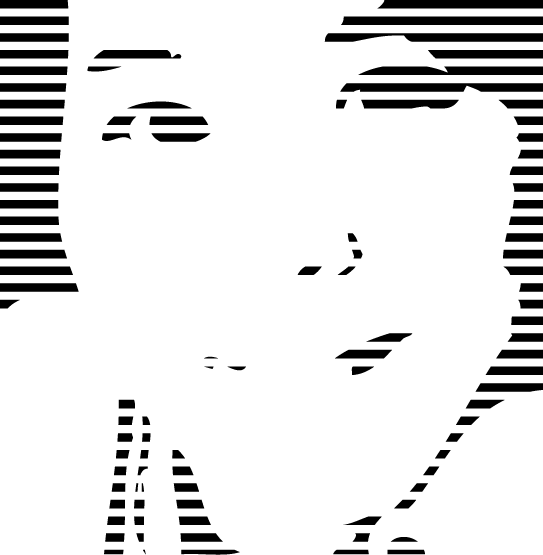
I used a snapshot image of myself and ran it through the Processing code. It generated a pattern on the right side. Then I cleaned up the file a bit via Illustrator (live trace, merge, trim, etc).
The larger image on the bottom is the file I imported to the embroidery software.
.
.
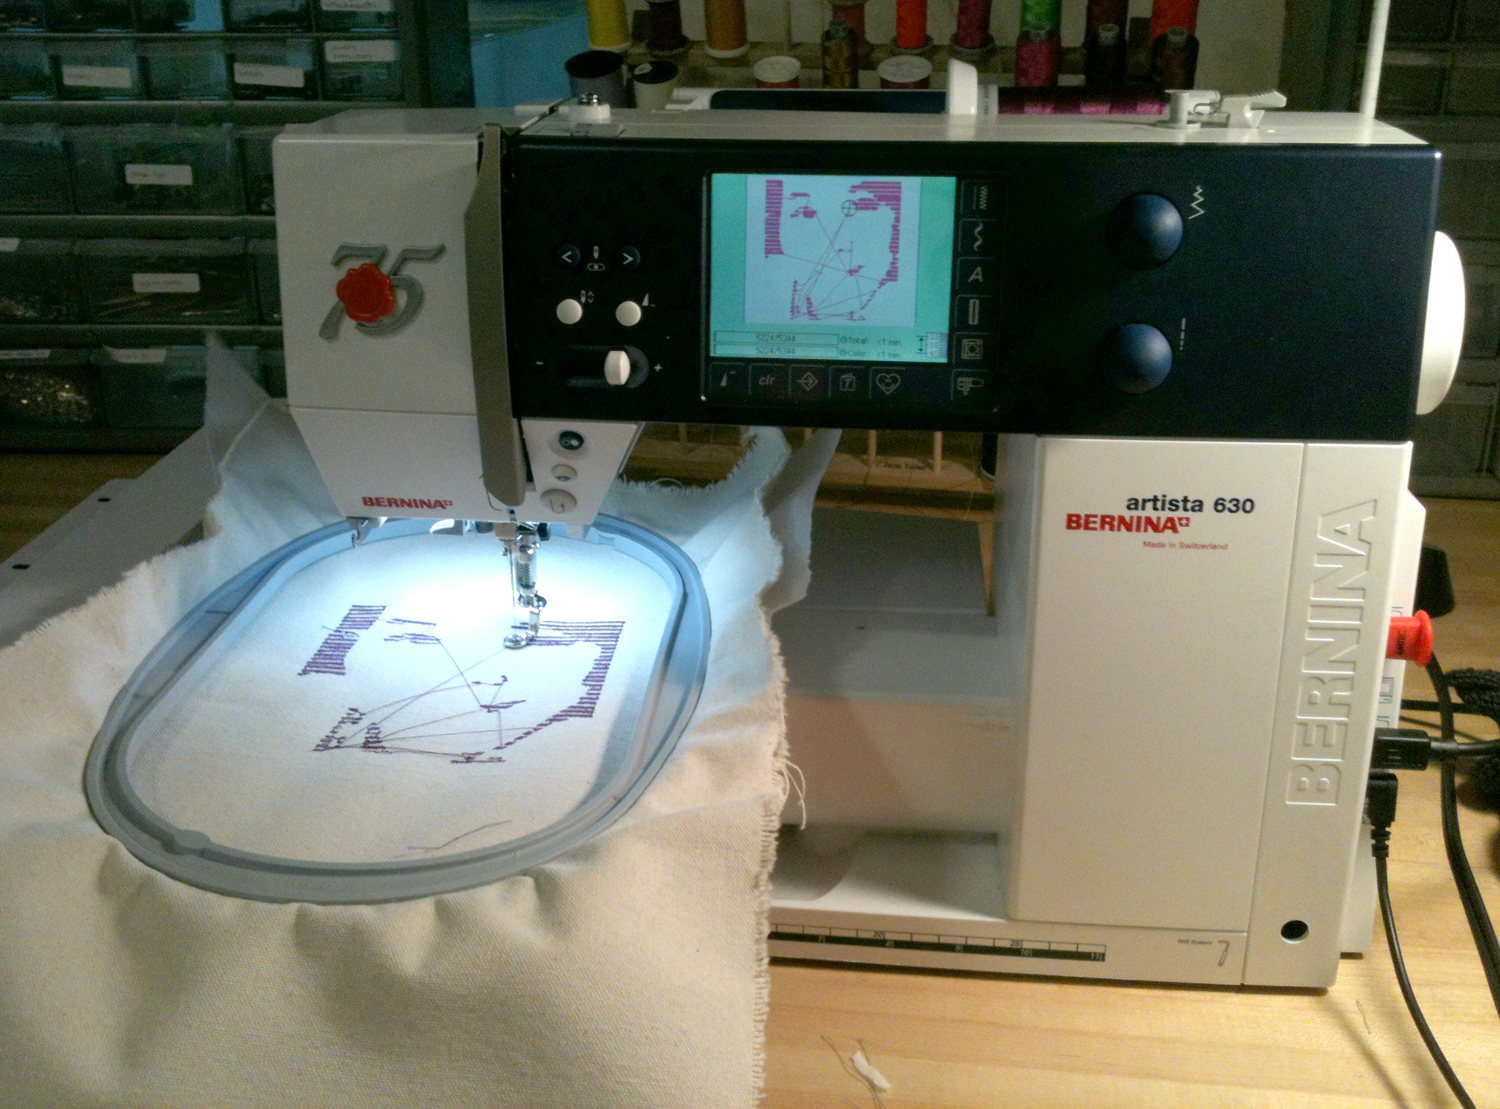
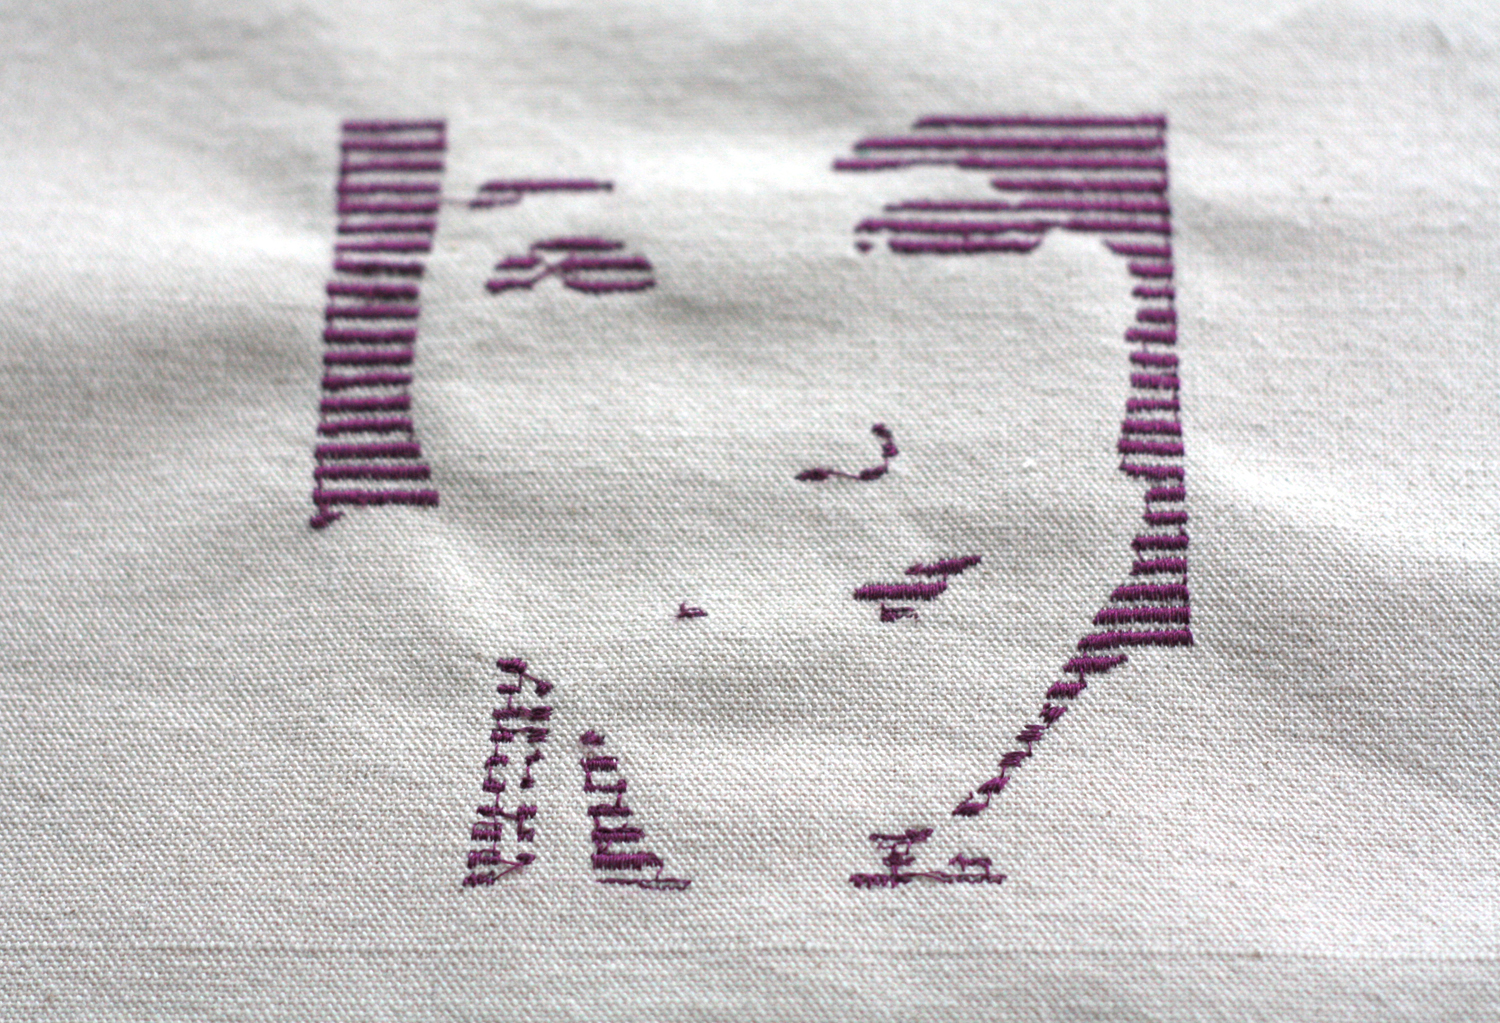
Bernina embroidery machine in action! (It took a while to figure out the machine with its error messages, spools running out of thread, but once everything was set, the rest of the process was seamlessly easy) And here’s the final embroidery above. One of a kind embroidered portrait.