Laser Cut Vest
by rbatzer
Laser Cut Wool Vest presentation
Final Project: A professional style women’s vest with laser cut lace appliqué based on a vornoi digram of a lissajous curve and a prolate cycloid.
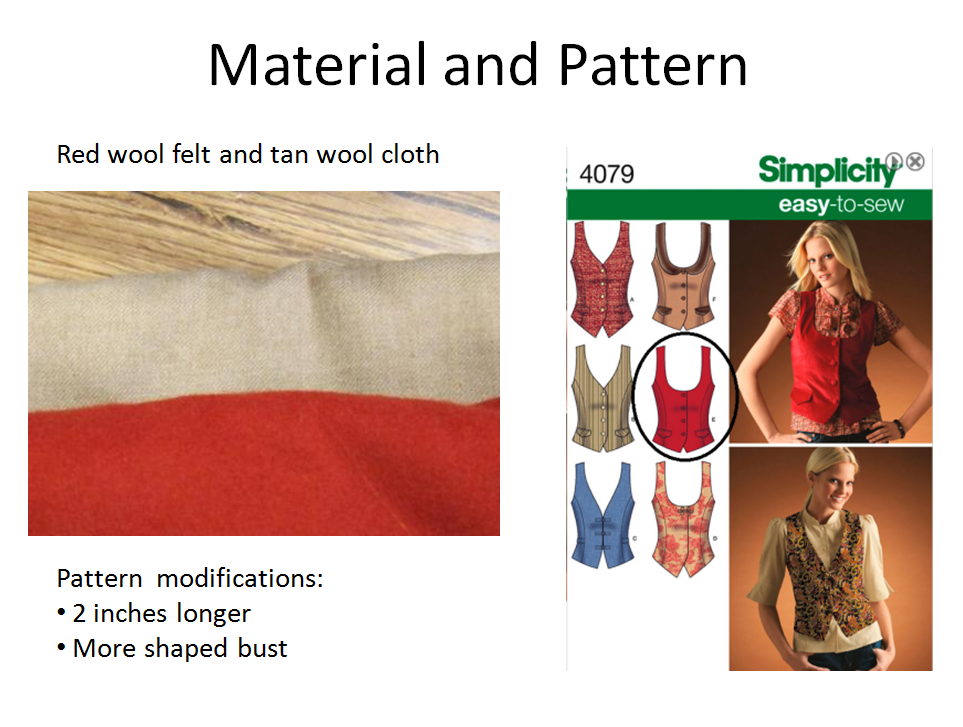
The laser cut dresses are very delicate and would be difficult to wear. The goal of this project is to make a usable clothing item by iron on fusing and sewing the laser cut pattern down.
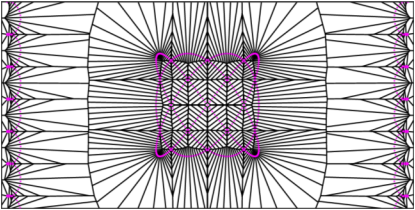
The pattern will be based on mathematical shapes with a voronoi diagram. Once the 2D pattern is created, it will be modified to fit the panels of the vest pattern.
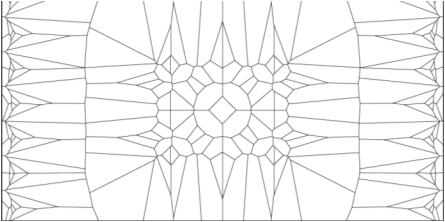
Lissajous curve on the back of the vest
Using Lincoln Labs Logo 
x = 3 sin(8πt/T) and y = 4 sin(6πt/T)
http://www.ll.mit.edu/about/History/logo.html
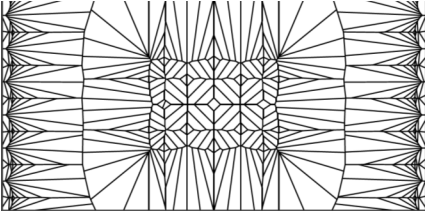
Prolate Cycloid on the front flaps

The Voronoi diagram selected has 200 points per geometric figure and is 1200 x 600. A selection of design iterations is below.
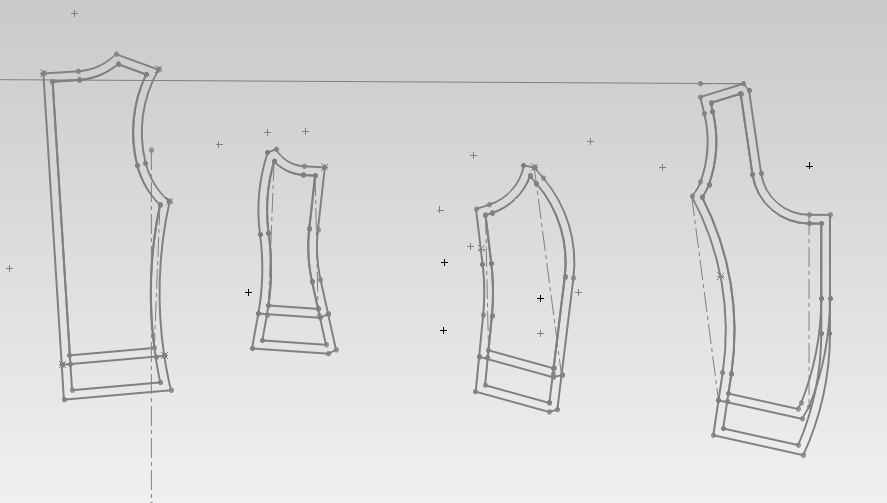
Once the vest pattern and diagram were selected, the diagram needed to be modified to fit the pattern
1.Measure vest pattern and put in SolidWorks
2.Line up edges close together
3.Move individual lines so that the lines will touch at the seams.
4.Extend lines to account for seams.
SolidWorks drawing of pattern ( converted by hand)
Final Design
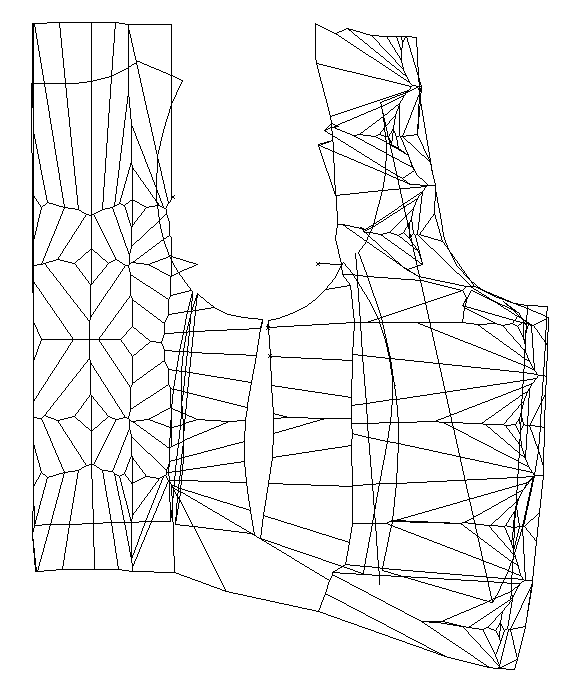
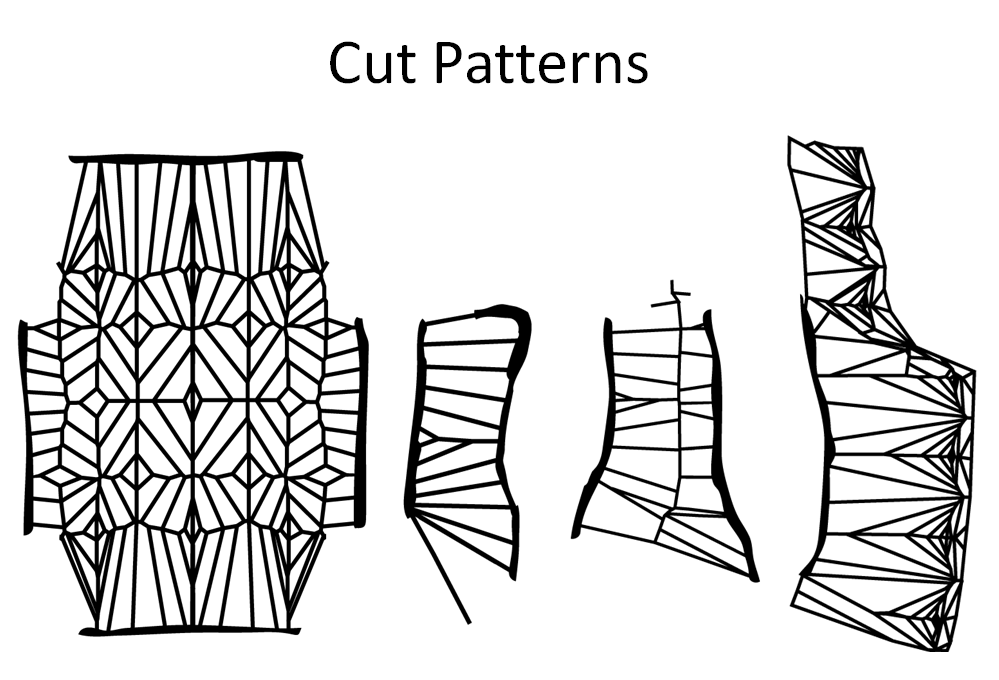
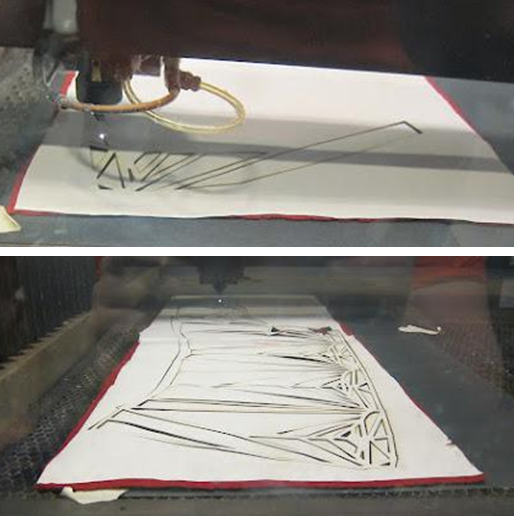
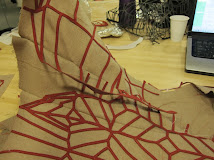
Cutting the diagrams
laser cutting wool SMELLS. You are literally burning hair. It works best if you cut with the iron on facing up because it reduces the burning. I found it effective to cut with 100% speed and about 45 watts.
The smell is reasonably easily washed out and the burned areas gets washed away so the final product looks very nice.
The Fun Part:
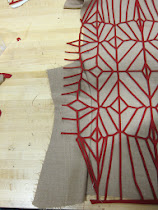
Making the patterns line up at the seams
Cut patterns seam to be a little too large making fitting difficult
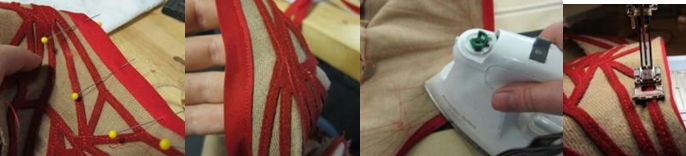
Below is the simplified version of how the fitting was done:
1. Line up patterns on the front and back panel
2.Iron down central area of the back and front panels
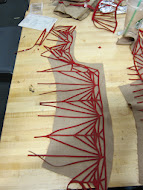
3.Line up middle two patterns: Excessive pinning is the answer to your problems.
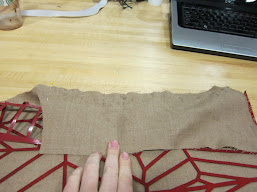
4.Iron down remainder
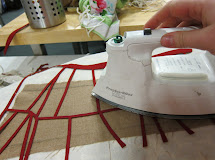
Finishing Touches
Sew over the pattern: more stable than iron-on alone. This takes a HUGE amount of time. It took me about 10 hours and I was aiming for speed over accuracy. It is worth it if you want the garment to last.
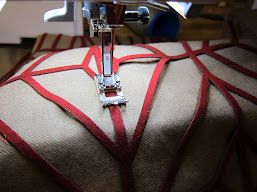
Complete edges with bias tape.
Steps: sew 1/4 seam flat, iron over, sew down
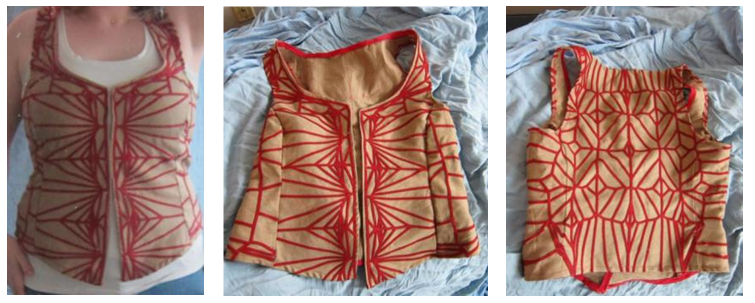
Finished Vest ( ~25 hours of work )