Topological Knitting
by anasto
I was fascinated by creating 3D knit structures with interesting topologies on a knitting machine, and wanted to see if I could create 3D structures by hand. Most hand knitting that I have done creates surfaces with some texture, but not with 3D protrusions. Here, I have experimented with a few techniques.
With the knitting machine, and the pattern that was provided for part 1 of the assignment, I knitted this swatch with a triangular protrusion.

By holding stitches, protrusions are created with the knitting machine by selectively knitting stitches more or less times than other stitches, creating a desired 3D shape. I have never tried this method by hand, so I decided to see what kind of structures could result by doing this same method with hand knitting.
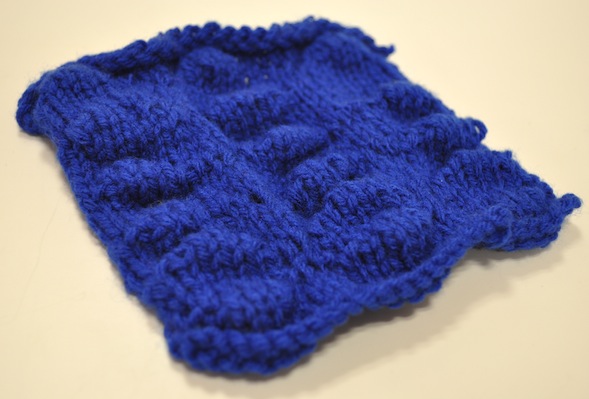
I created this stitch pattern to make a swatch with 3 columns of bumps that are made by selectively working some stitches more than others, similar to the method of the knitting machine. However, with hand knitting, the gauge is larger and there are less stitches, so the visual effect is more subtle.
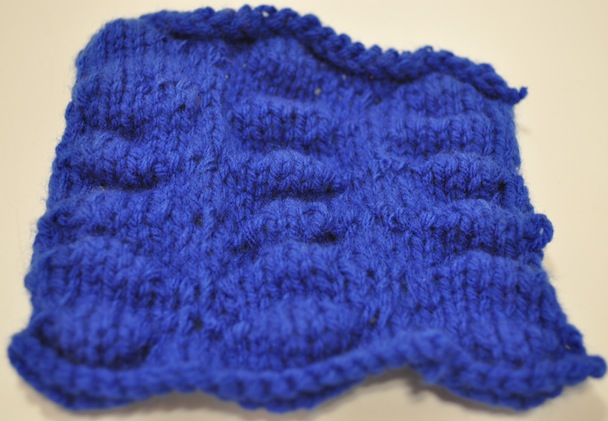
- Using size 7 needles and worsted weight yarn, cast on 27 stitches.
- Stockinette stitch first four rows (knit and purl every other row)
- All in stockinette: slip 1, knit 7, slip 1. continue working only these nine stitches. slip 2, purl 5, slip 2. slip 3, knit 3, slip 3. slip 4, purl 1, slip 4. and backwards: slip 3, knit 3, slip 3, slip 2, purl 5, slip 2. slip 1, knit 7, slip 1.
- Continue onto next nine stitches in the row in the same pattern. Then do the next nine after that.
- Purl, knit, purl next three rows.
- Continue repeating the pattern until desired length.
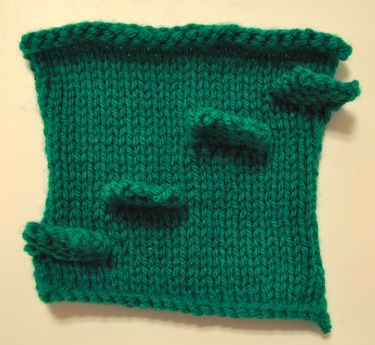
I also tried a technique different from the one employed by the knitting machine. Here, I created a stitch pattern where stitches are put on stitch holders and then knitted after the main body of the swatch is completed. This creates flaps that stick out perpendicular to the surface of the swatch.
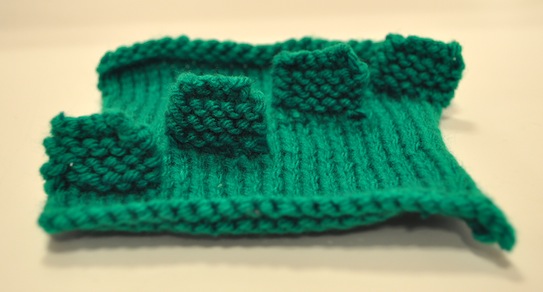
- Using size 7 needles and worsted weight yarn. Cast on 24 stitches, stockinette stitch 6 rows.
- On a purl row, make increases on the first 6 stitches by purling in the front and the back of each stitch. Use markers to keep track of the increased stitches. Purl the remaining stitches in the row.
- For the increased stitches: knit 1, slip 1 onto a safety pin or scrap piece of yarn, repeat until you have knitted 6 stitches and placed 6 stitches on hold. Knit the remaining 18 stitches.
- Stockinette stitch 6 more rows.
- On a purl row, purl the first 6 stitches, then increase the next 6 by purling in the front and the back of each stitch, purl the remaining 12 stitches.
- In the next row, knit the first 12 stitches. For the increased stitches: knit 1, slip 1 onto a stitch holder until there are 6 knit and 6 on the stitch holder. Knit the remaining 6 stitches.
- Stockinette stitch 6 more rows.
- On a purl row, purl the first 12 stitches, then increase the next 6 by purling in the front and the back of each stitch, purl the remaining 6 stitches.
- In the next row, knit the first 6 stitches. For the increased stitches: knit 1, slip 1 onto a stitch holder until there are 6 knit and 6 on the stitch holder. Knit the remaining 12 stitches.
- Stockinette stitch 6 more rows.
- On a purl row, purl the first 18 stitches, then increase the last 6 by purling in the front and the back of each stitch.
- For the increased stitches: knit 1, slip 1 onto a stitch holder until there are 6 knit and 6 on the stitch holder. Knit the remaining 18 stitches.
- Stockinette stitch 6 more rows. Bind off.
- Pick up stitches that are held on safety pins or scrap yarn. Knit 5 rows (garter stitch), then bind off. Do this for all the stitches on holders.